Ghost Meringues
Posts may contain affiliate links, meaning that I may earn a commission if you use a link provided.
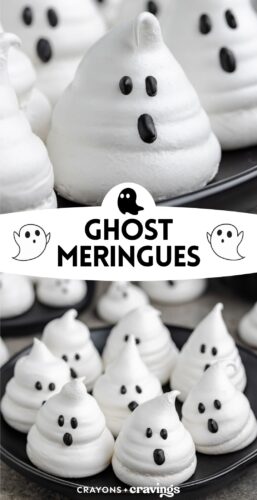
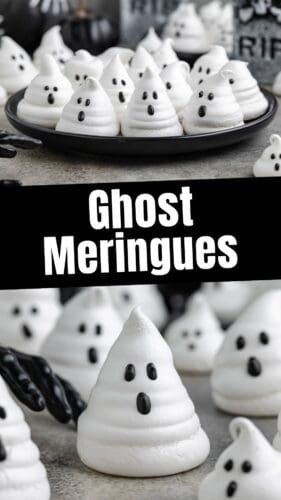

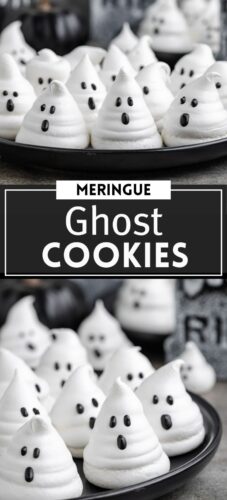
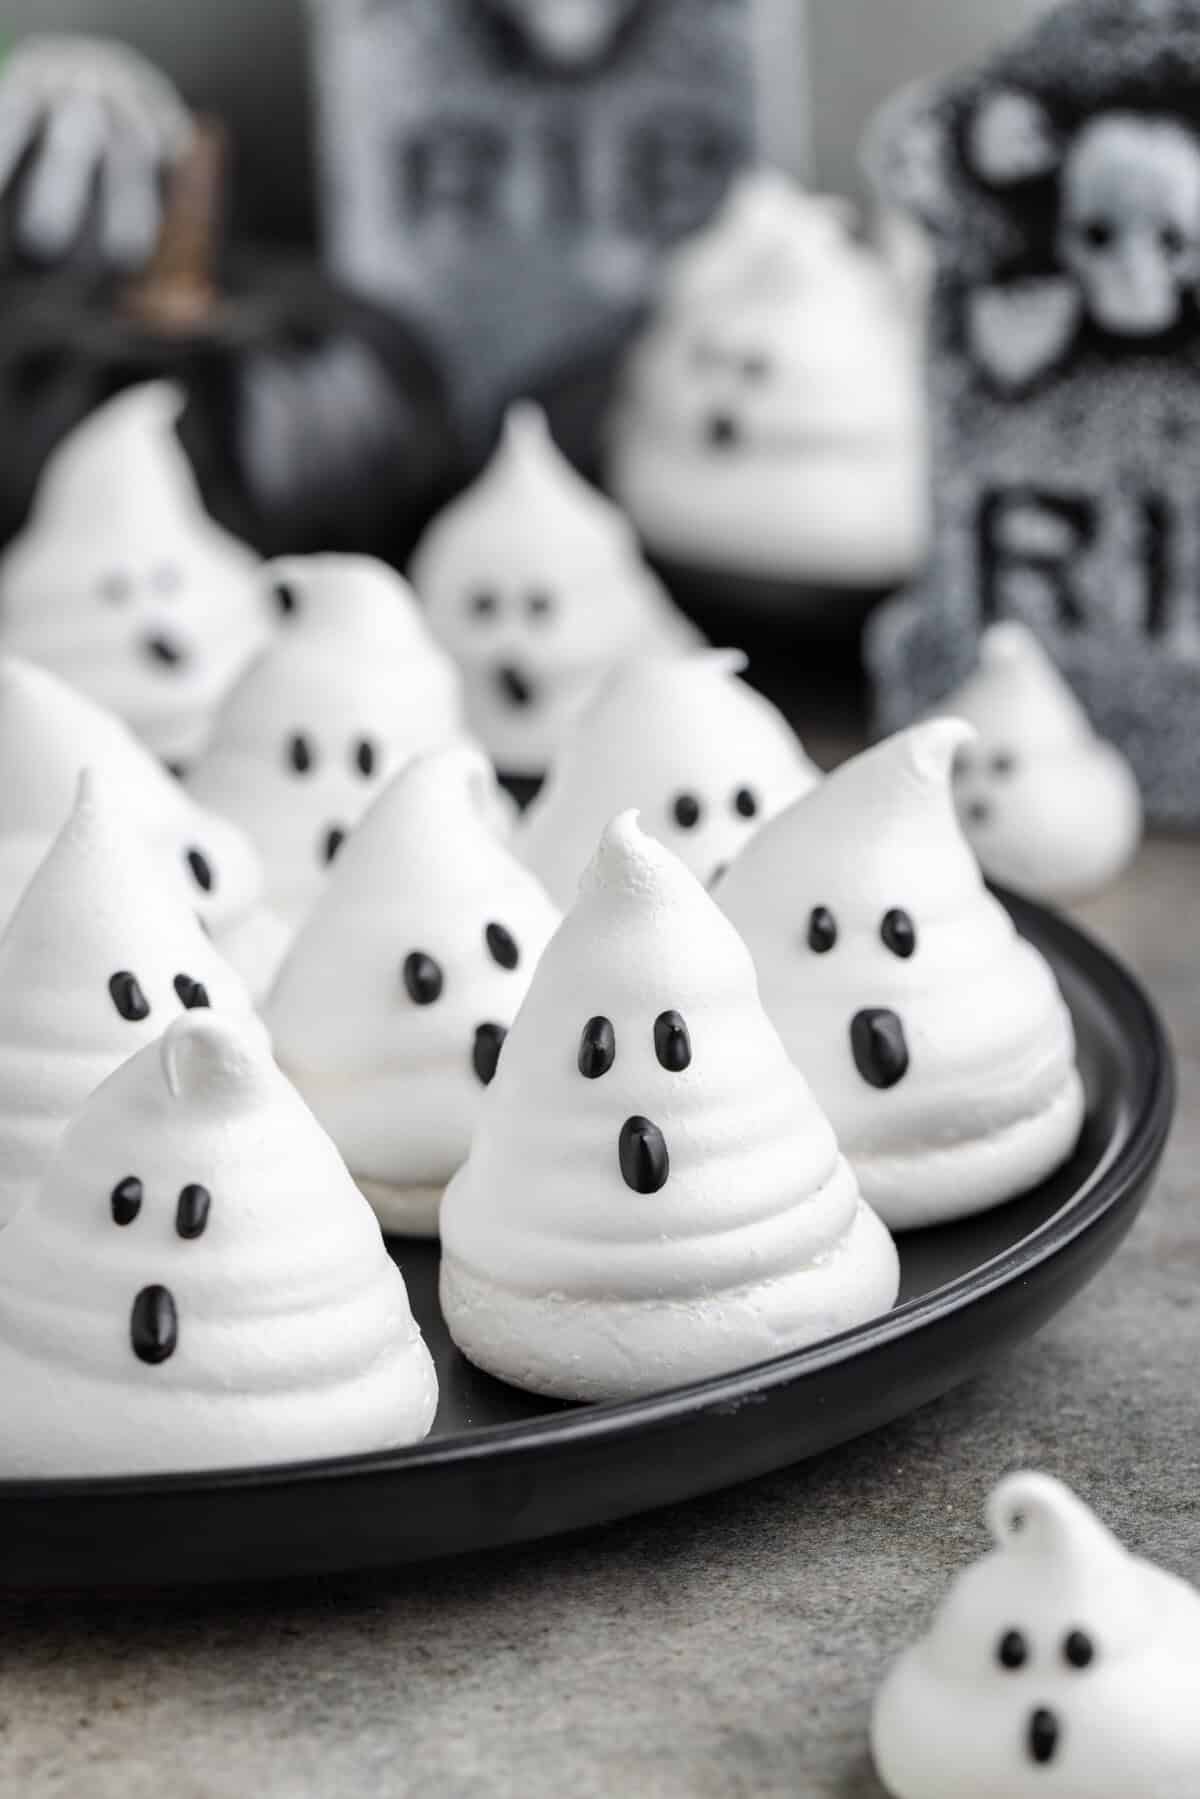
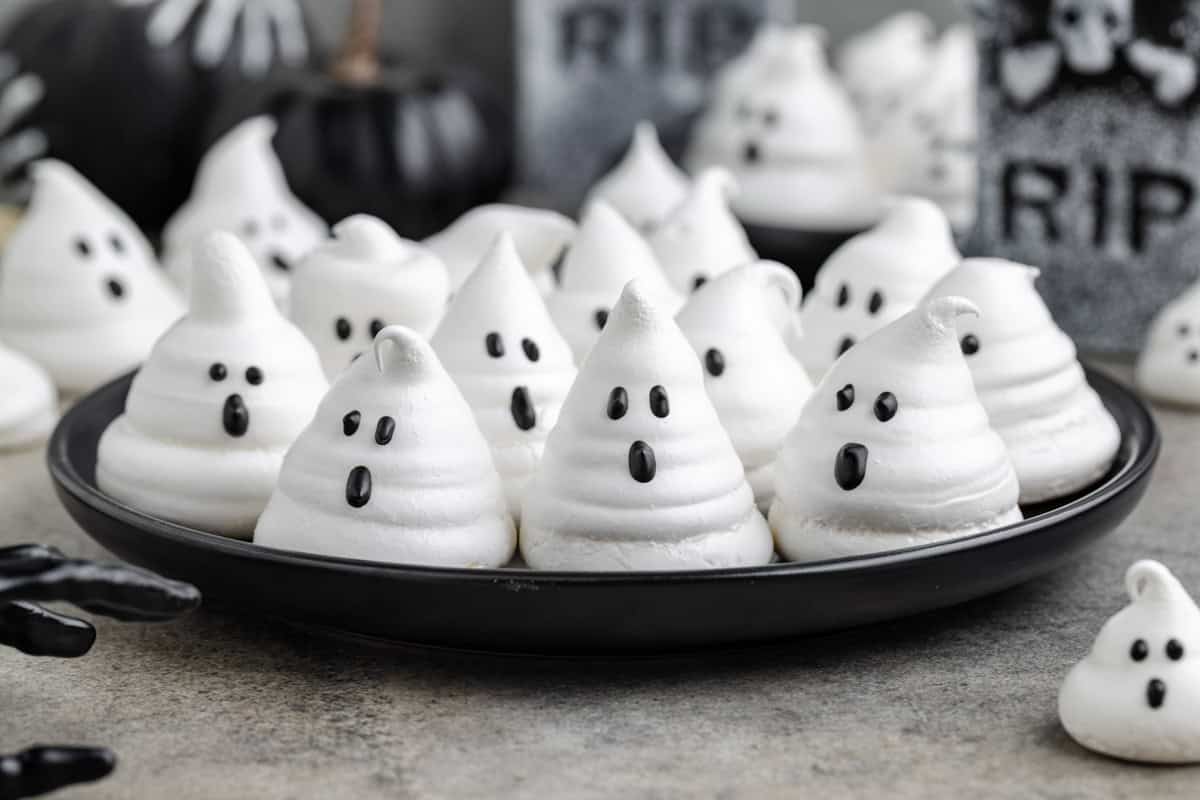
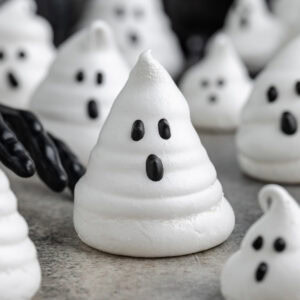
Ghost meringues are one of those Halloween treats that never fail to get a smile. They’re light, crisp, and sweet meringue cookies shaped like little ghosts with candy eyes that make them as cute as they are tasty.
You only need a few ingredients to pull these off, which makes them one of my favorite easy Halloween cookie recipes. They’re also a hit on any spooky dessert table, especially alongside ghost donuts or a fun ghosts in a graveyard dessert.
This is a great recipe to make with kids — they’ll love piping the shapes and adding faces. It’s messy in the best way, and the results are adorable.
So start your Halloween night with ghost shaped pizza for dinner, then serve these charming meringue ghost cookies for dessert. It’s a festive (and simple!) way to celebrate the season — and definitely one of the best Halloween treats to make and share.
Why you’ll love this recipe
- Just 5 pantry ingredients
- Adorably spooky
- Naturally gluten-free
- A fun and festive Halloween dessert
Ingredients for Meringue Ghosts
This section includes ingredient notes and substitution options. Get all measurements, ingredients, and instructions in the printable recipe card at the end of this post.
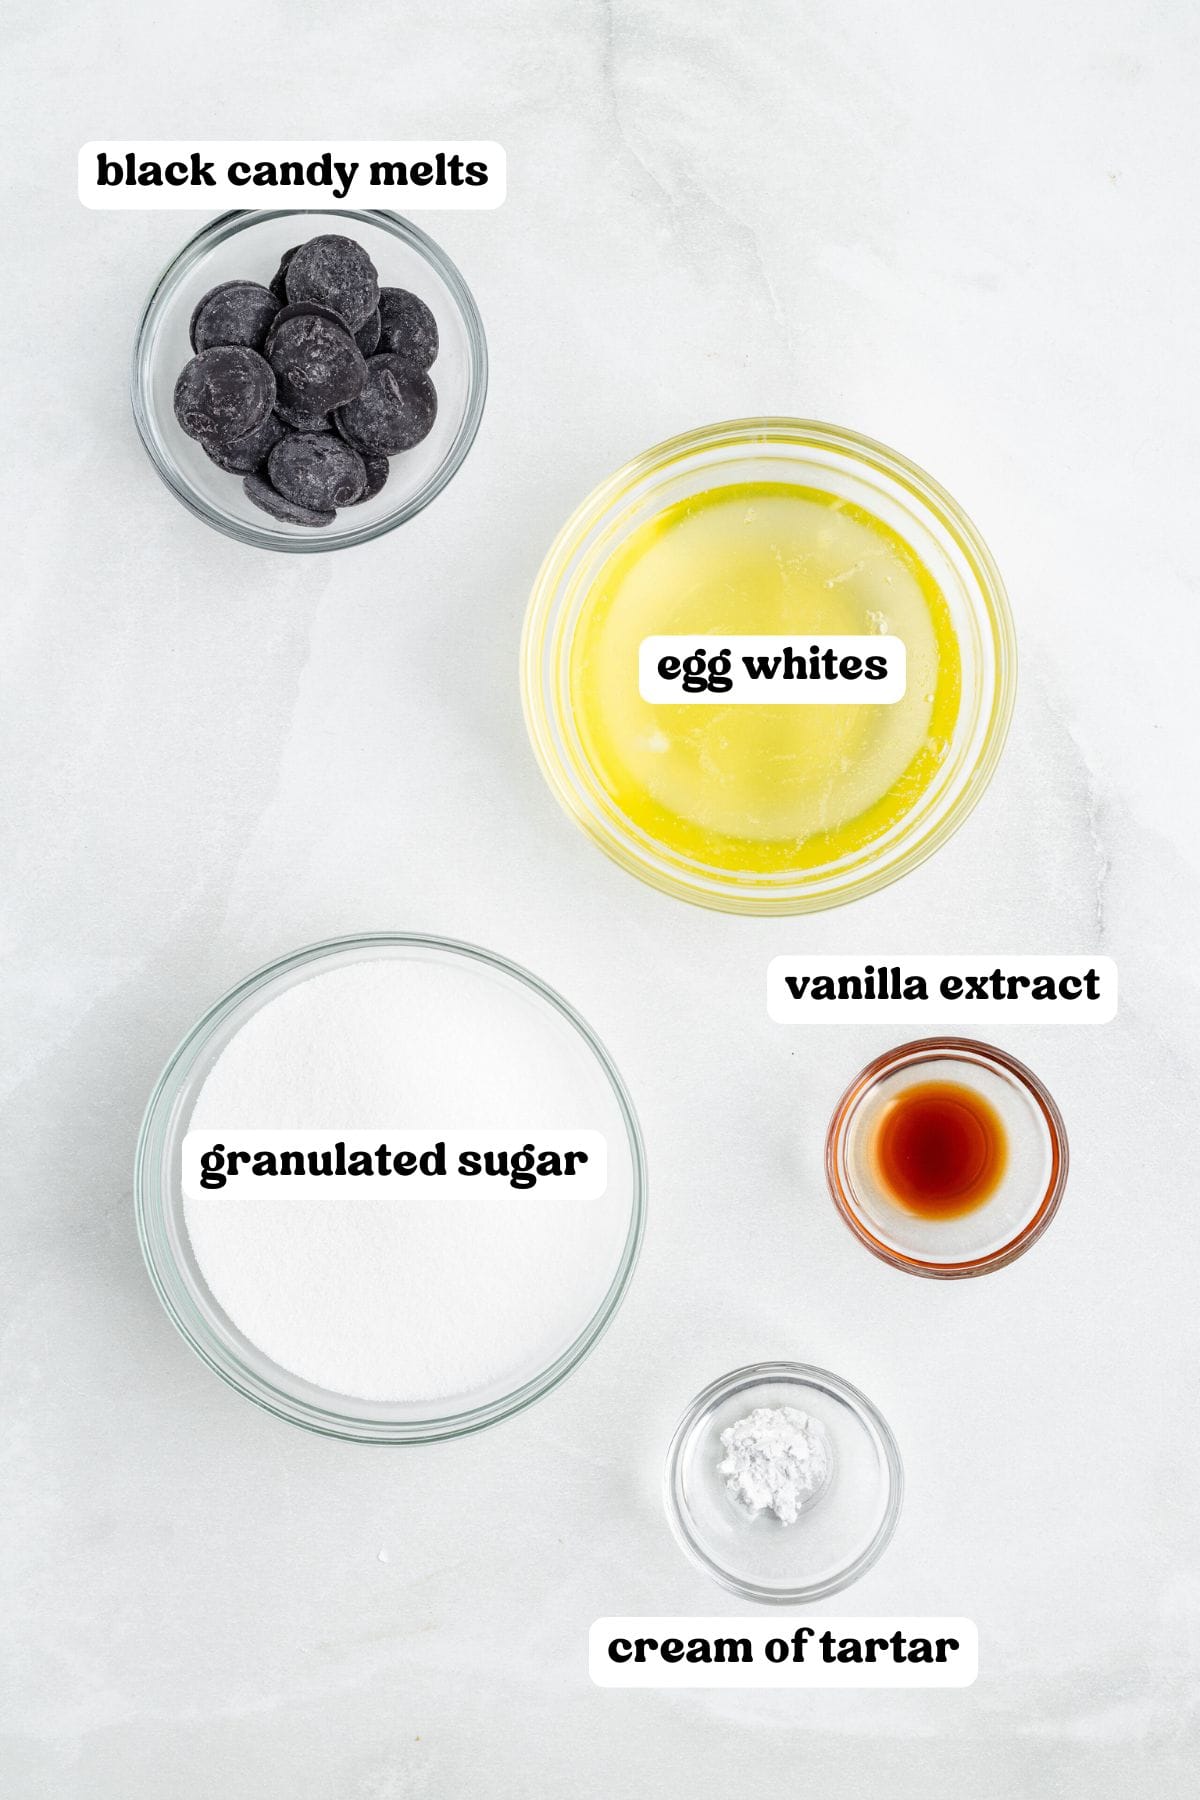
- Egg whites – Room temp whites whip up faster and hold more volume. Make sure there’s no yolk at all in your bowl.
- Cream of tartar – This is the stabilizer that holds the shape of the egg whites and also provides that signature sheen.
- Granulated white sugar – For sweetness. They are a cookie after all!
- Vanilla extract – Optional, adds subtle flavor.
- Black candy melts – Used for eyes and mouths. You can also use melted chocolate, candy eyes, or black royal icing.
How to Make Ghost Meringues
This section shows you how to make the recipe with step-by-step photos and instructions. For the full printable recipe, see the recipe card below.
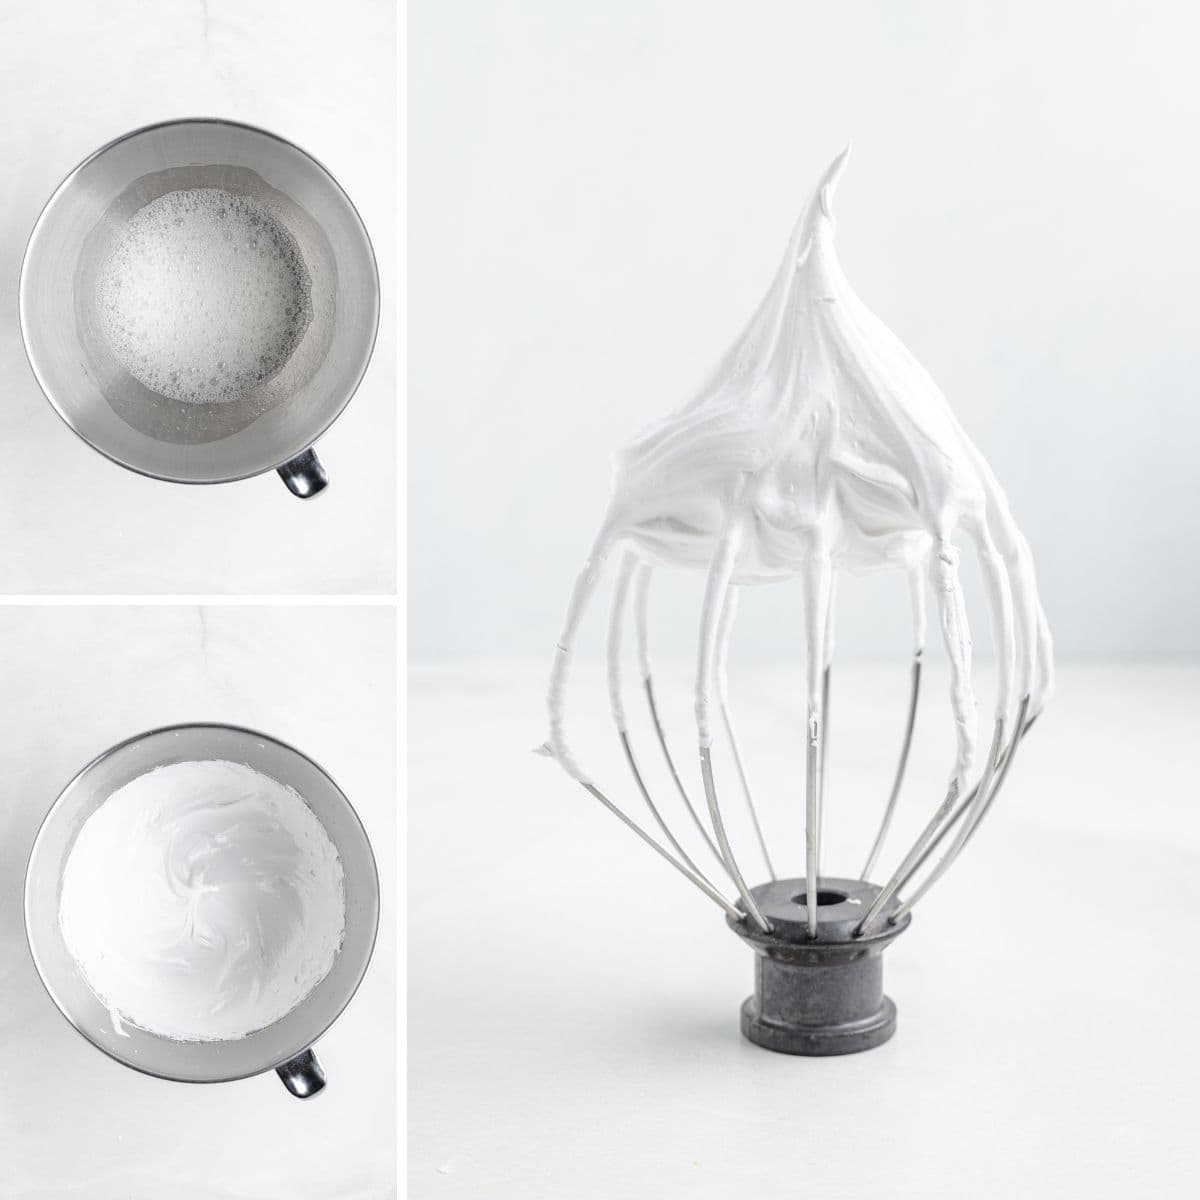
Step 1: In a clean, dry mixing bowl with a hand mixer, or the bowl of a stand mixer using the whisk attachment, beat egg whites and cream of tartar until frothy. Gradually add sugar, then beat until stiff, glossy peaks form. When you lift the whisk out of the bowl, the peaks should hold firm.
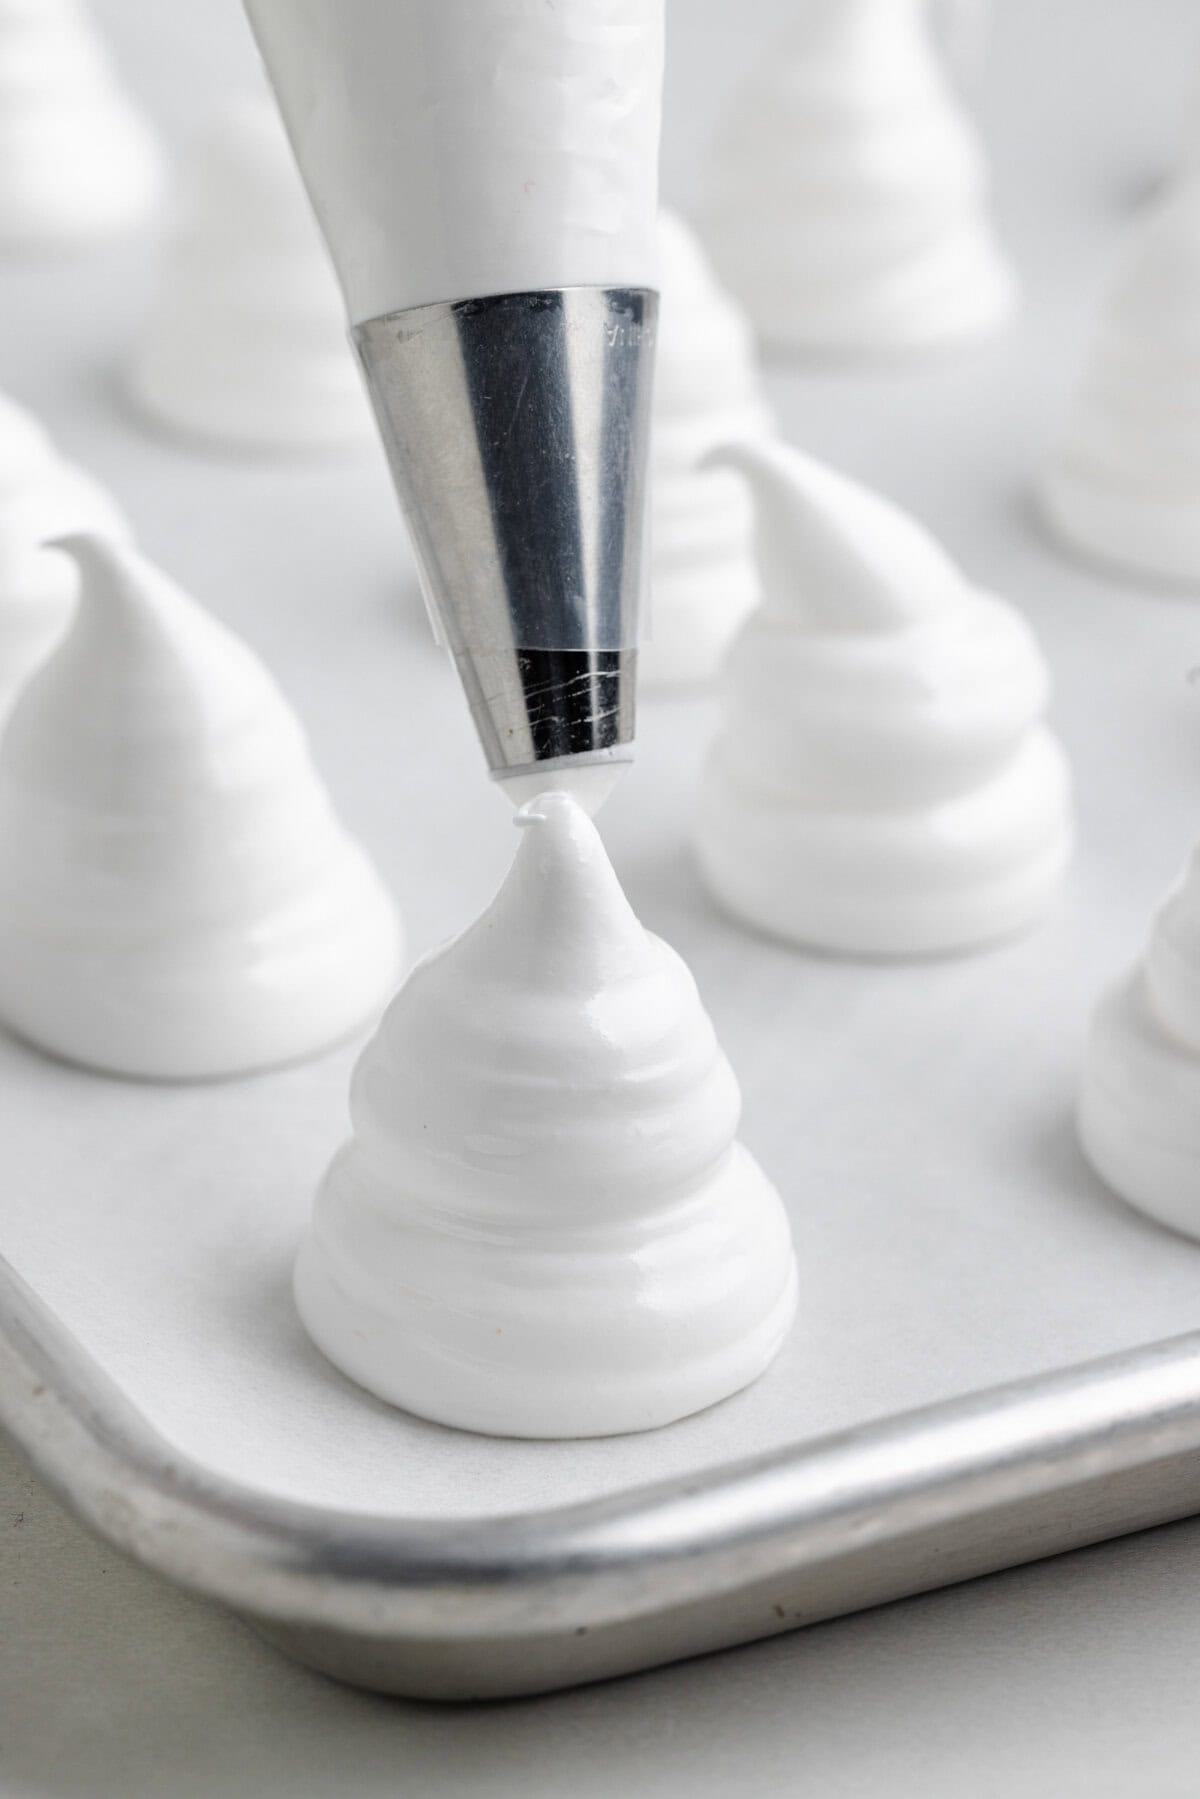
Step 2: Spoon mixture into a piping bag or pastry bag fitted with a large round tip. Pipe tall ghost shapes onto baking sheets. To get high mounds of meringue, start at the base with a large dollop and continue in a circular motion, gradually piping smaller circles as you work your way up.
Step 3: Bake for 45 minutes, then turn off the oven and let them cool inside without opening the door for at least 2 hours.
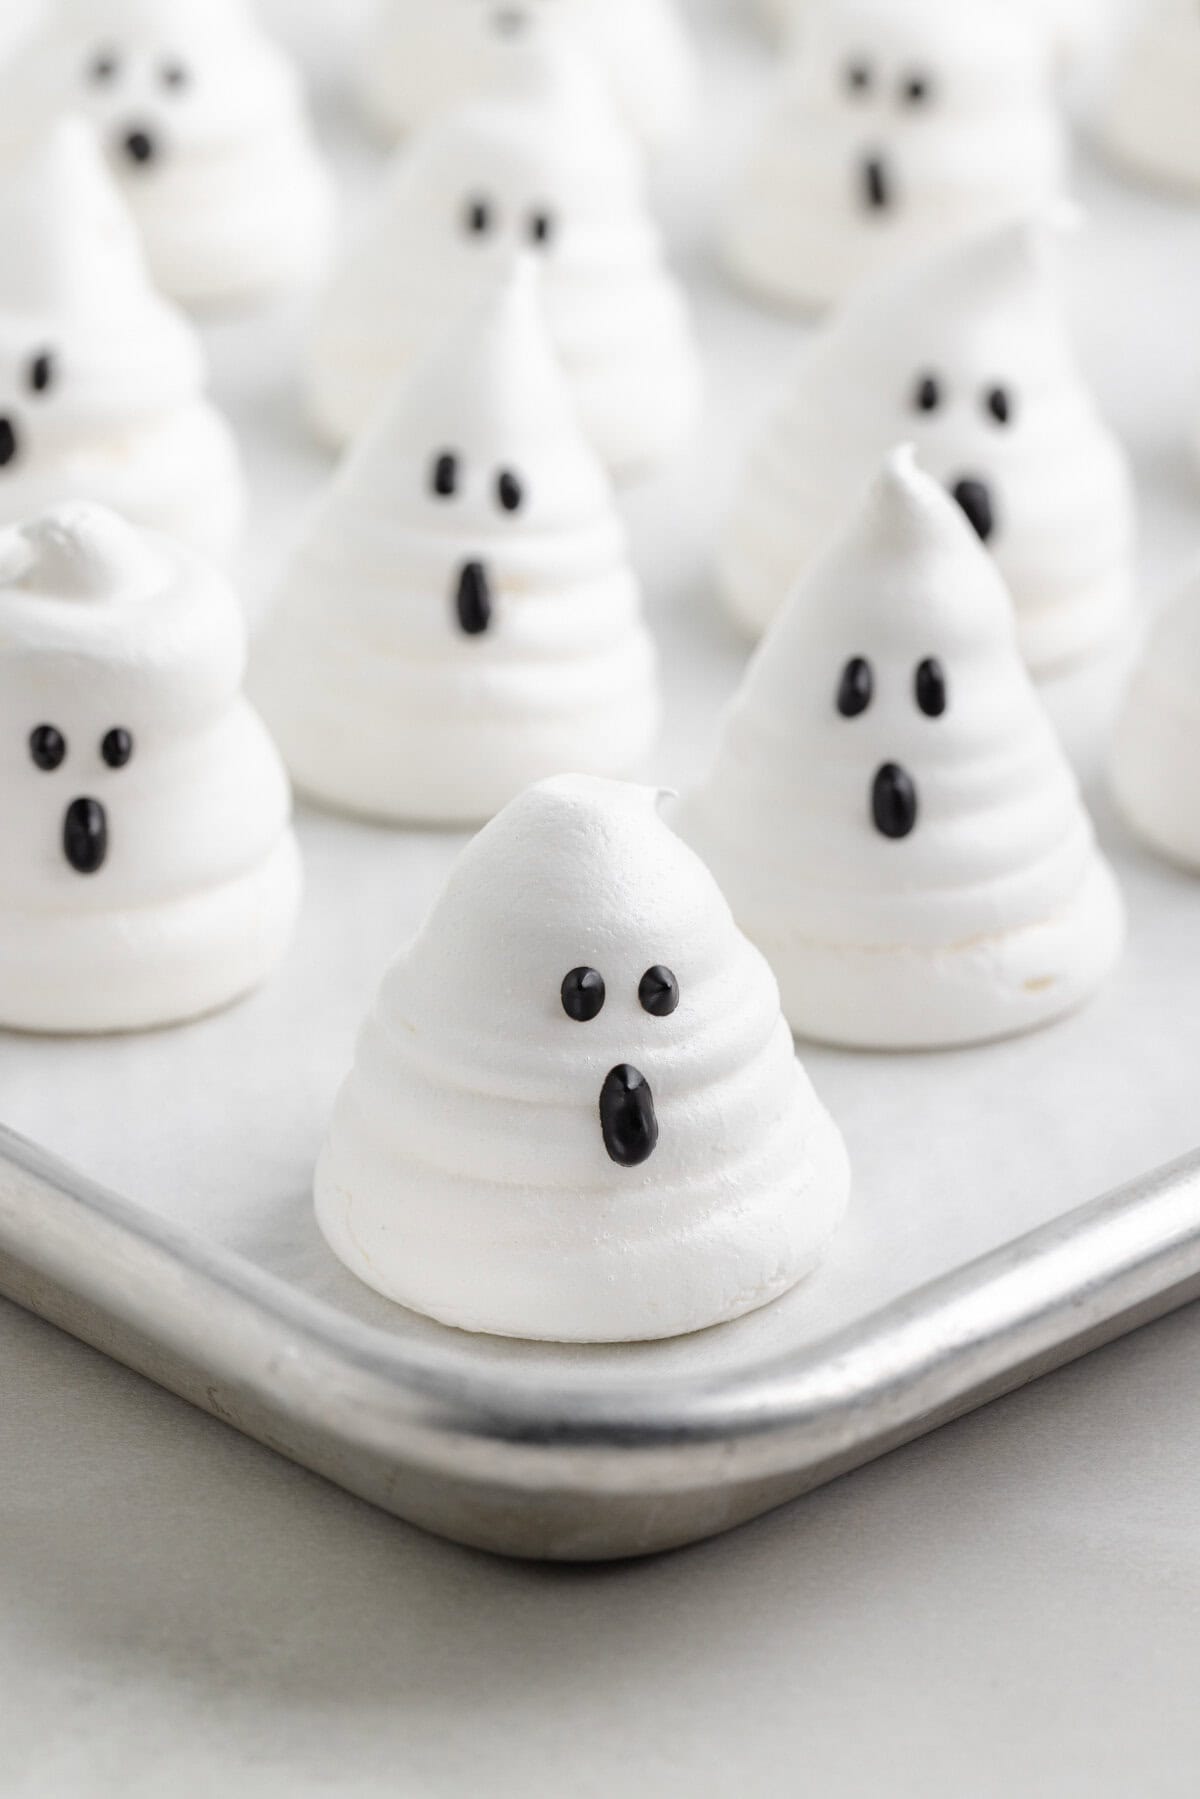
Step 5: Once cool, use melted candy melts to add eyes and mouths.
Make Ahead
Make a batch the day before your Halloween party and allow them to cool overnight in the oven.
Storage
- Store in an airtight container at room temperature in a cool, dry place for up to 5 days.
- Avoid the fridge — humidity will soften the meringues.
- Not freezer-friendly: freezing causes them to absorb moisture and lose crispness.

Recipe Tips
- Bring eggs to room temperature. Room temperature egg whites whip up faster and create more volume.
- Use a clean, dry bowl. Any excess grease or moisture can prevent your egg whites from whipping properly.
- Line your cookie sheets with parchment paper. This will prevent sticking and allow the cookies to be released easily. Silicone mats would work as well.
- Do not open the oven door. I know it’s tempting, but any change in temperature as they are drying can cause cracking!
Additions & Variations
- Colorful ghosts: Add a few drops of orange or purple gel food coloring to the meringue mixture.
- Different shapes: Pipe pumpkins, bats, or bones for more spooky shapes.
- Flavored meringues: Add peppermint or almond extract in place of vanilla.
- Mini ghosts: Use a smaller piping tip to make bite-sized meringues.
More Halloween Recipes
- Halloween Popcorn Hands
- Oreo Spiders
- Slime Filled Halloween Cookies
- Halloween Chex Mix
- Frankenstein Rice Krispie Treats
Ghost Meringue Cookies
Equipment
Ingredients
- 4 large egg whites, room temperature
- ¼ teaspoon cream of tartar
- 1 cup granulated sugar
- 1 teaspoon vanilla extract
- 2 teaspoons black candy melt
Instructions
- Preheat oven to 200°F. Line two baking sheets with parchment paper. Set aside.
- Beat egg whites and cream of tartar in a clean, dry bowl using a hand mixer or stand mixer with a whisk attachment. Mix on medium speed until frothy.4 large egg whites, ¼ teaspoon cream of tartar
- Add sugar gradually, 1 tablespoon at a time, while mixing. Once all sugar is added, increase speed to high and beat until stiff, glossy peaks form (about 5–7 minutes). The mixture should hold its shape when the whisk is lifted.1 cup granulated sugar
- Add vanilla and mix just until combined.1 teaspoon vanilla extract
- Transfer meringue to a piping bag fitted with a large round tip (like Wilton 2A). Pipe tall ghost shapes onto prepared sheets, leaving about 1 inch between each.
- Bake for 45 minutes. Then turn off the oven (do not open the door) and let meringues cool inside for at least 2 hours or overnight.
- Melt black candy melts according to package directions. Use a toothpick, skewer, or piping bag with a fine tip to dot on eyes and mouths. Let set completely.2 teaspoons black candy melt
Notes
- Use a completely clean, grease-free, dry bowl — any oil or yolk will prevent stiff peaks from forming.
- Room temperature egg whites whip up faster and create more volume.
- Meringue should be thick, glossy, and form stiff peaks before piping.
- Do not open the oven door while cooling. Sudden temperature changes can cause cracking.
- These cookies are best enjoyed within 3–5 days and stored in an airtight container at room temp (not refrigerated).
Nutrition

Did You Make This Recipe?
Share it with me on Instagram @crayonsandcravings and follow on Pinterest @crayonsandcravings for even more!