Chocolate Covered Honeycomb Candy
Posts may contain affiliate links, meaning that I may earn a commission if you use a link provided.
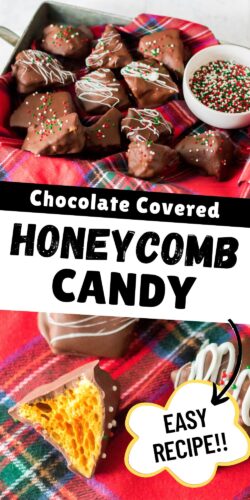
Baking soda is the secret ingredient to making this fun and festive chocolate covered honeycomb candy. The bubbles create the honeycomb texture! Light, crispy, and dipped in the perfect amount of chocolate, it makes a great homemade Christmas gift.
Turn simple ingredients like sugar, corn syrup, honey, baking soda, and chocolate into the most addictive treat you’ve ever made in your kitchen. Some say that it’s even better than my Christmas Crack recipe, and that’s really saying something!

If you’re looking for a totally crave-worthy recipe for homemade candy, this is it. It’s similar to a honey-infused Butterfinger if you’re in the U.S., a Cadbury Crunchie chocolate bar available in England, or the Violet Crumble bars made in Australia. But instead of paying a small fortune to have those shipped to you, you can just make this easy recipe at home.
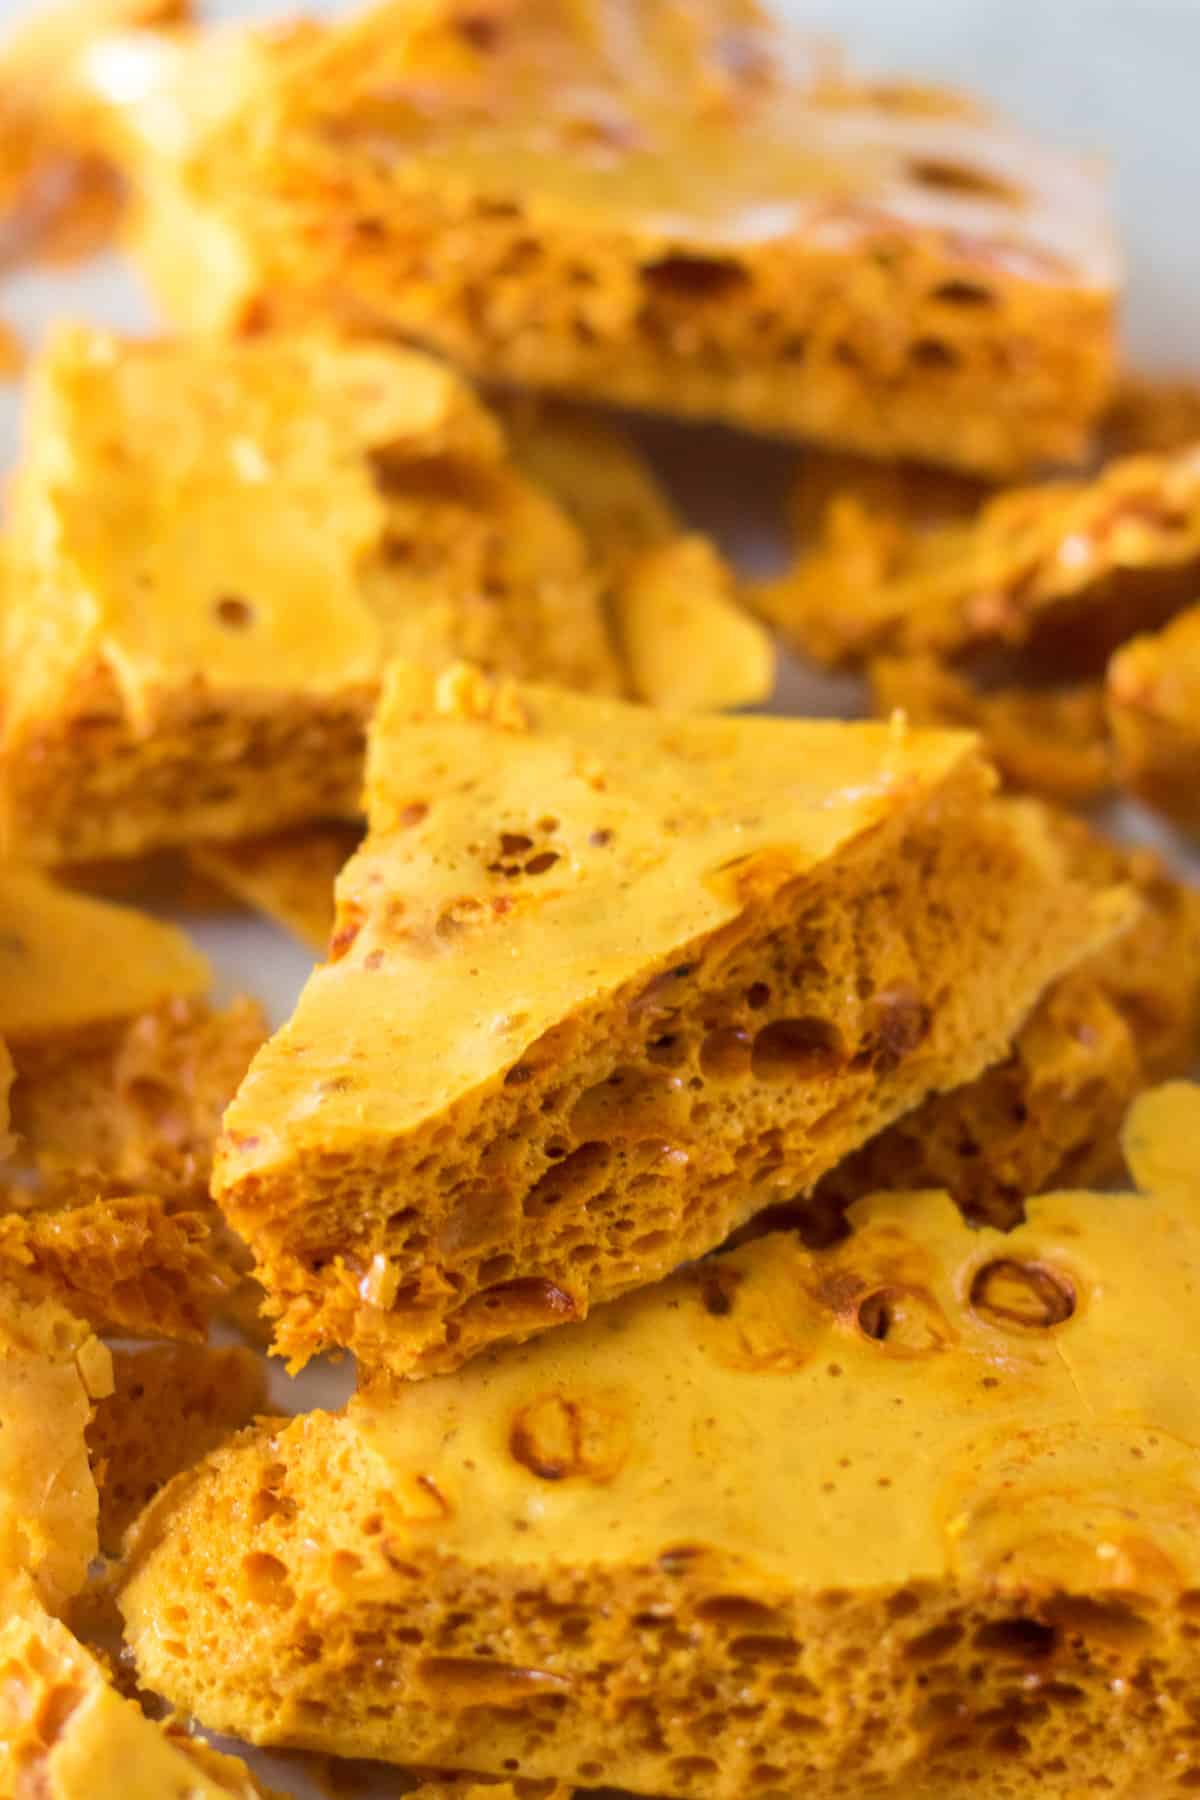
The inside is crispy and crunchy, but not too hard. Baking soda reacts to the heat, releasing gas bubbles that get trapped as the candy sets up. After it sets up, it’s a flaky, brittle toffee-like treat that you then dip in a chocolate coating.
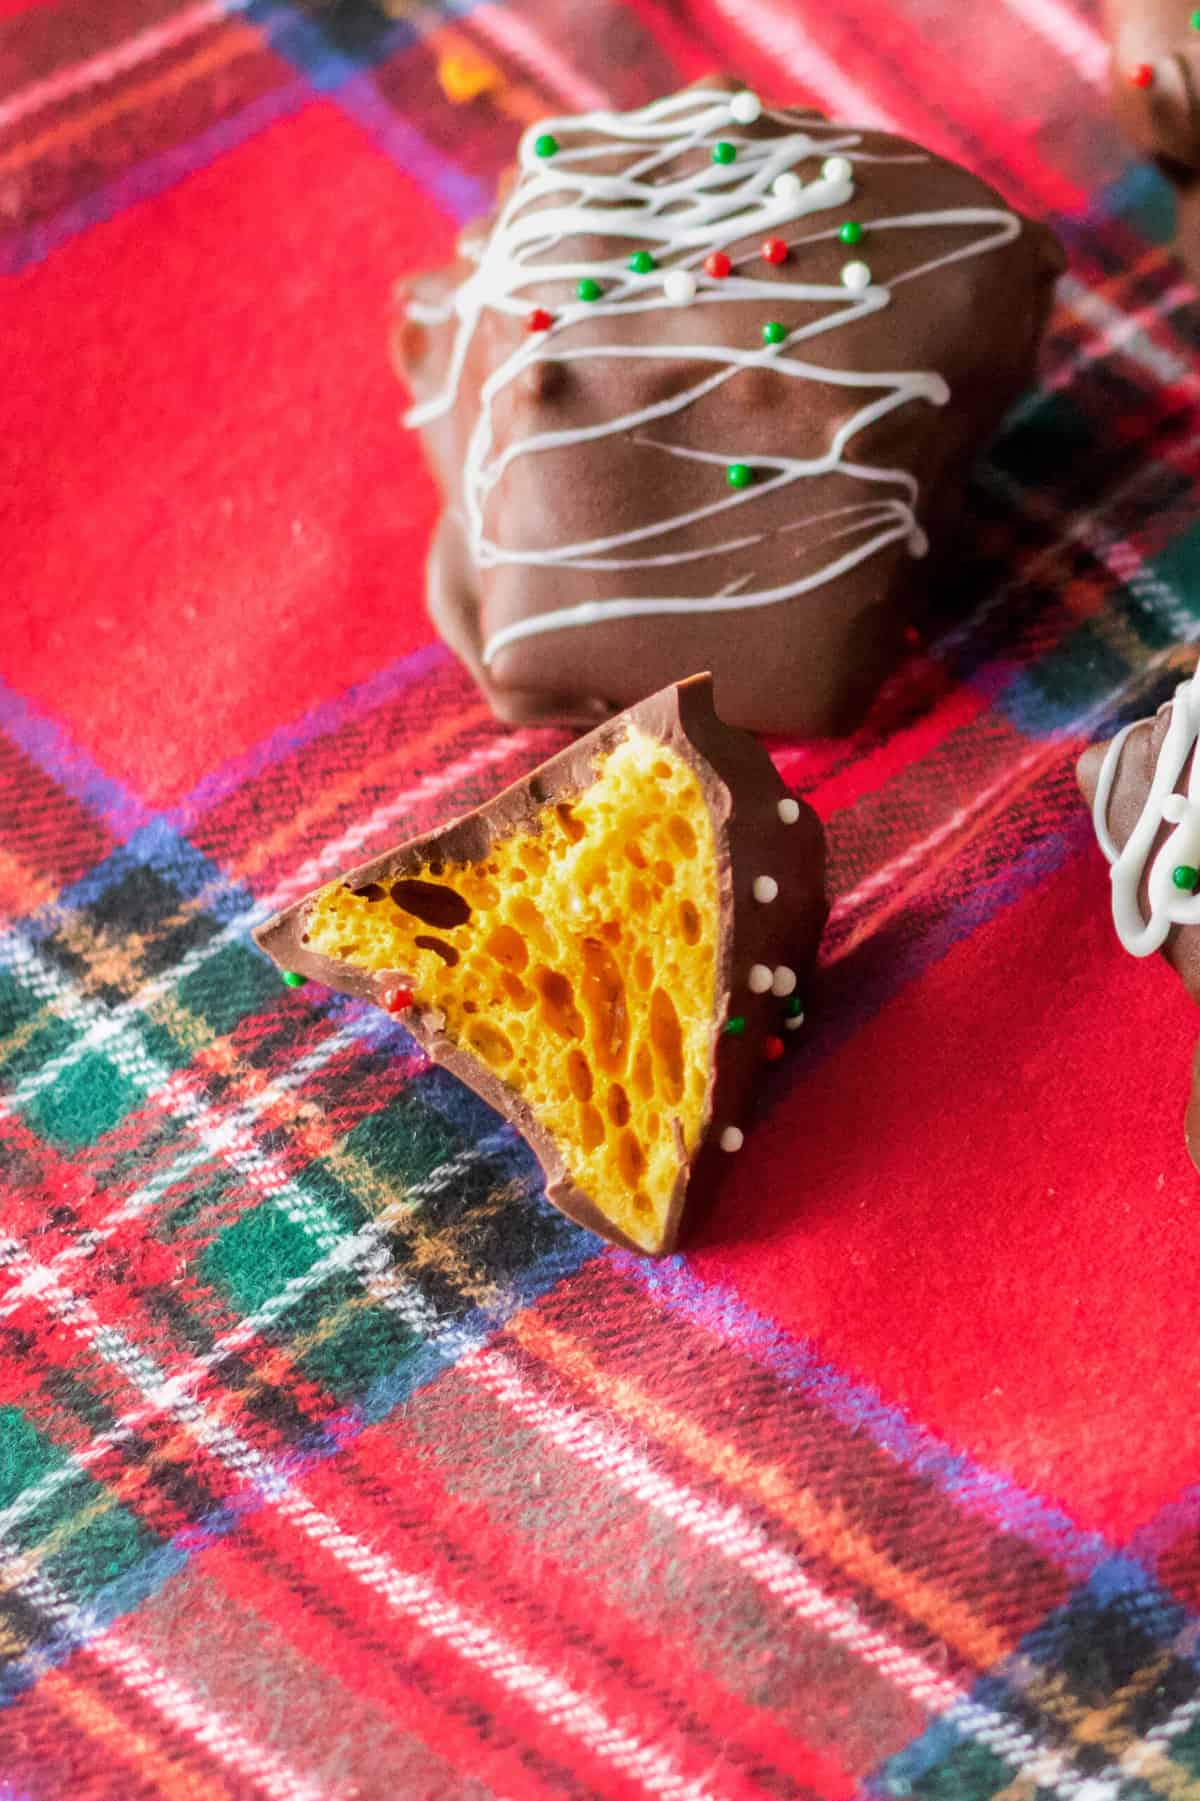
Honeycomb candy goes by several names like hokey pokey, cinder toffee, honeycomb toffee, angel food candy, sea foam candy, sponge toffee, and probably many others I’ve never heard of. No matter what you call it, it’s a candy lover’s dream and is the perfect sweet treat for the holiday season.
If you’re a fan of easy homemade candy, you’ll love this Peanut and Almond Brittle — just like Grandma used to make! My Homemade Peppermint Patties and Chocolate Rum Balls are holiday favorites that’ll be perfect for your candy tins along with this cinder toffee!
Ingredients
This section includes ingredient notes and substitution options. Get all measurements, ingredients, and instructions in the printable recipe card at the end of this post.
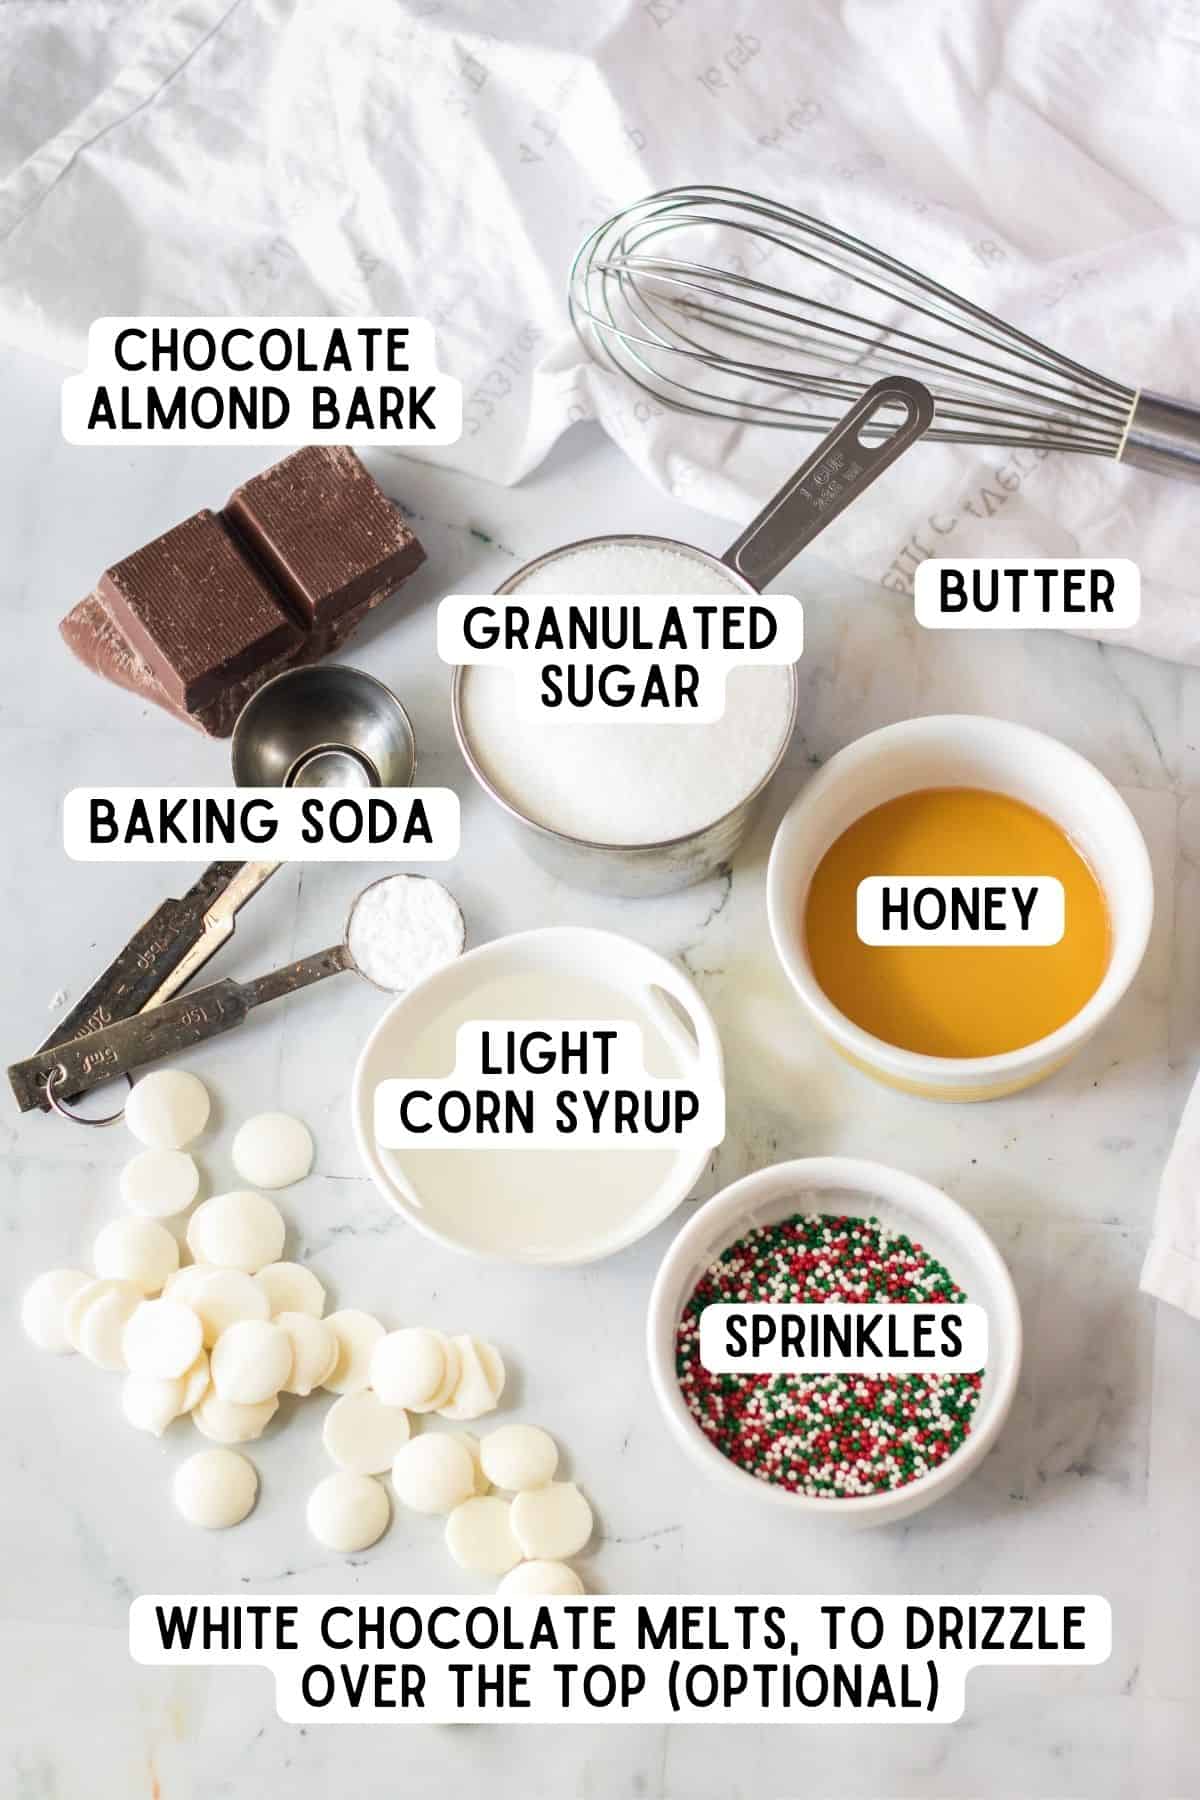
- Sugar — You’ll use granulated sugar along with corn syrup, honey, and water to make a caramel-like candy. Brown sugar may work, but I haven’t tried it myself in this recipe so I can’t say for sure.
- Water — Mix water in with the sugar, corn syrup, and honey to make the caramel-tasting honeycomb. It cooks off as the candy comes to temperature.
- Corn Syrup — Light corn syrup is best, but you can use dark corn syrup if that’s what you have on hand.
- Honey — Clover honey is the traditional variety for this recipe, but feel free to experiment with different honey flavors. You can use all corn syrup in place of the honey if you’d like, but if you’re going to make honeycomb candy, it should have some honey flavor.
- Baking Soda — This is how the magic happens! The baking soda creates air bubbles that get trapped in the sugar mixture to create the honeycomb appearance. Make sure you’re using FRESH baking soda.
- Chocolate Almond Bark — You can use any kind of chocolate coating here, even white chocolate!
- Sprinkles and White Chocolate — These are optional, but if you’re making this candy for a holiday party or to give as a gift, it makes them look more festive.
Equipment You’ll Need
Gather your kitchen tools to start on this yummy Christmas candy! You’ll need:
- 9×13 baking dish
- parchment paper
- heavy-bottomed pot
- wooden spoon
- whisk
- candy thermometer
- airtight container for storage
How to Make Chocolate Covered Honeycomb
This section shows you how to make the recipe with step-by-step photos and instructions. For the full printable recipe, see the recipe card below.
Step 1: Add parchment paper to a 9×13 baking dish with some paper hanging over the sides to serve as handles when you remove the candy from the pan. Set it aside for now. If you don’t have parchment paper, use tin foil sprayed with a neutral cooking oil.
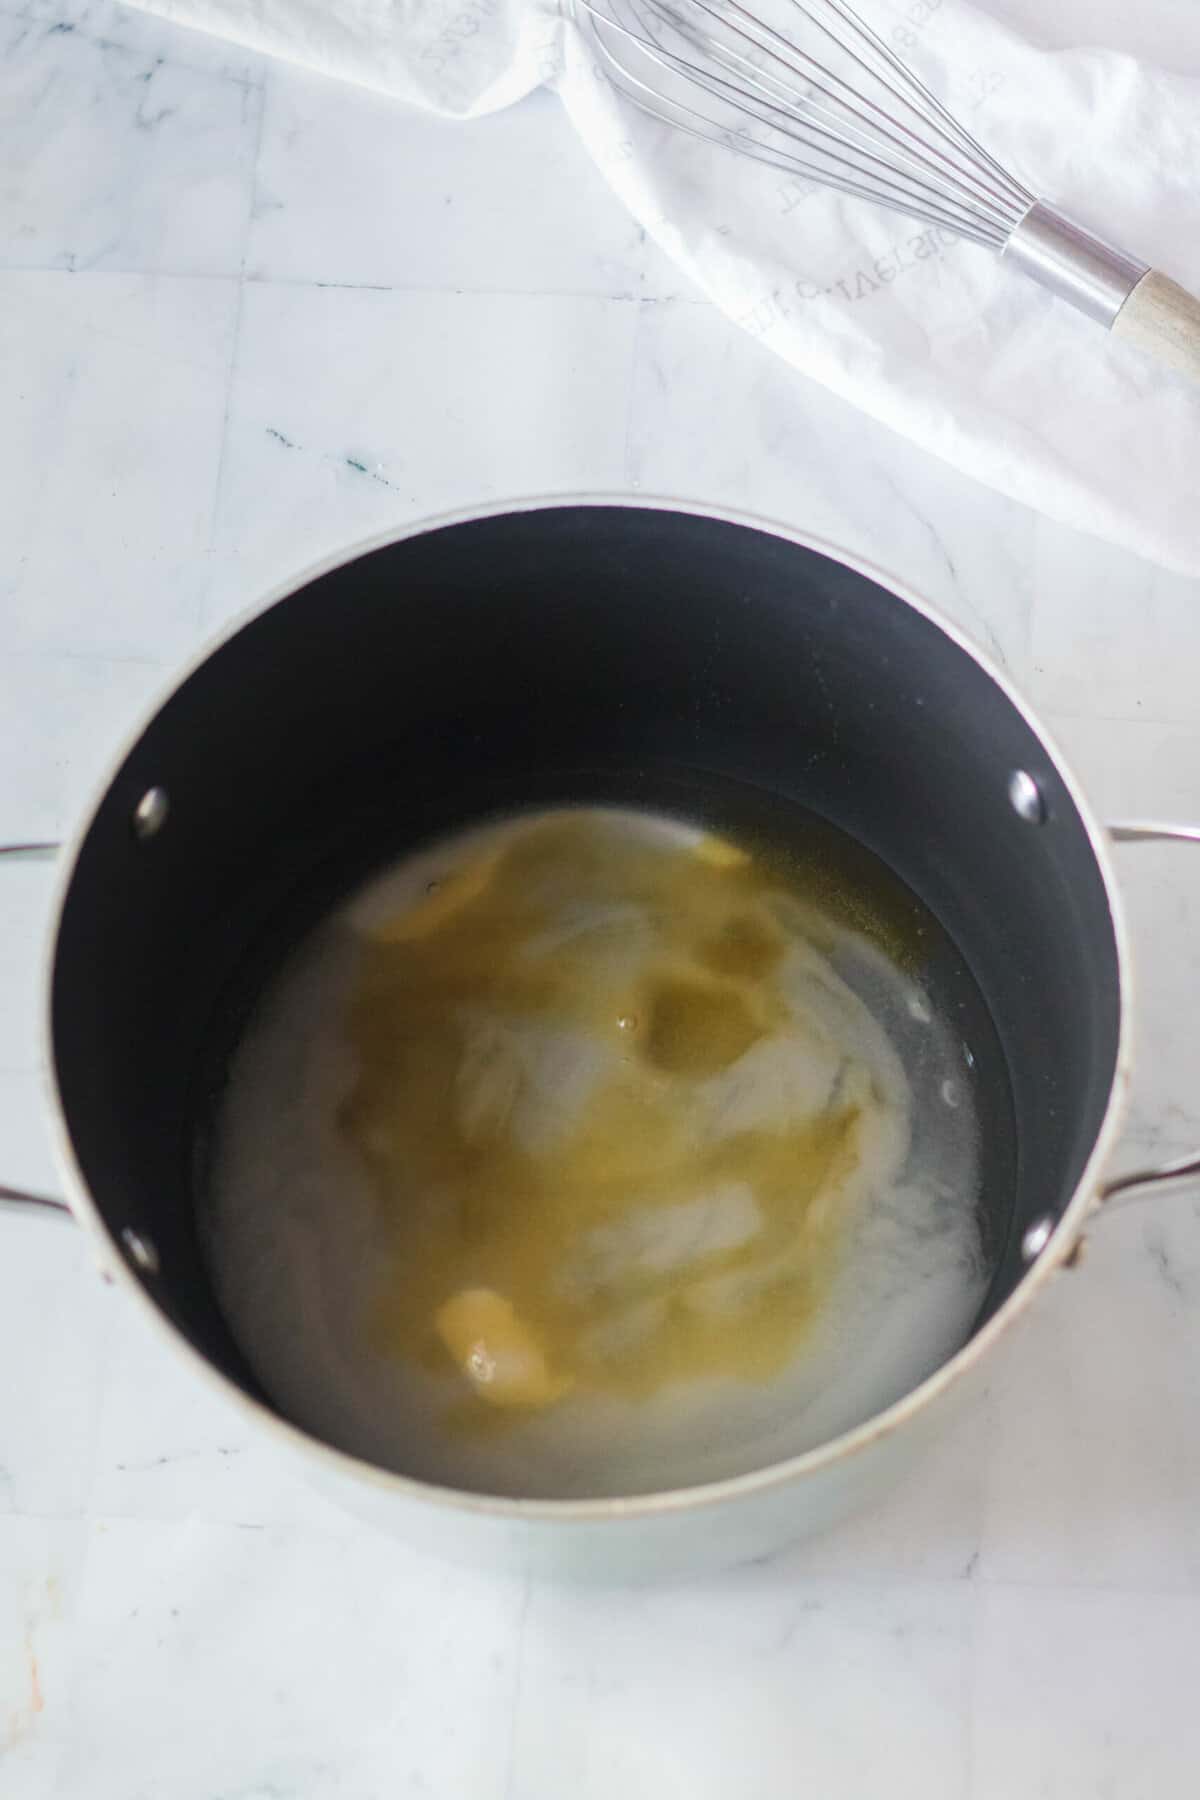
Step 2: Grab a pot with a heavy bottom, and add the sugar, water, corn syrup, and honey. Stir to combine. Cook the sugar mixture over medium-high heat until it reaches the hard crack stage when a candy thermometer reads 300°F or 149°C. Do not stir the sugar mixture while it’s cooking and coming to temperature. The candy will be light caramel in color when it’s ready.
Step 3: Remove the sugar mixture from the heat. Stir in the baking soda immediately. Stir it in until it’s just combined, but do not over-stir. It will double or triple in size during this step.
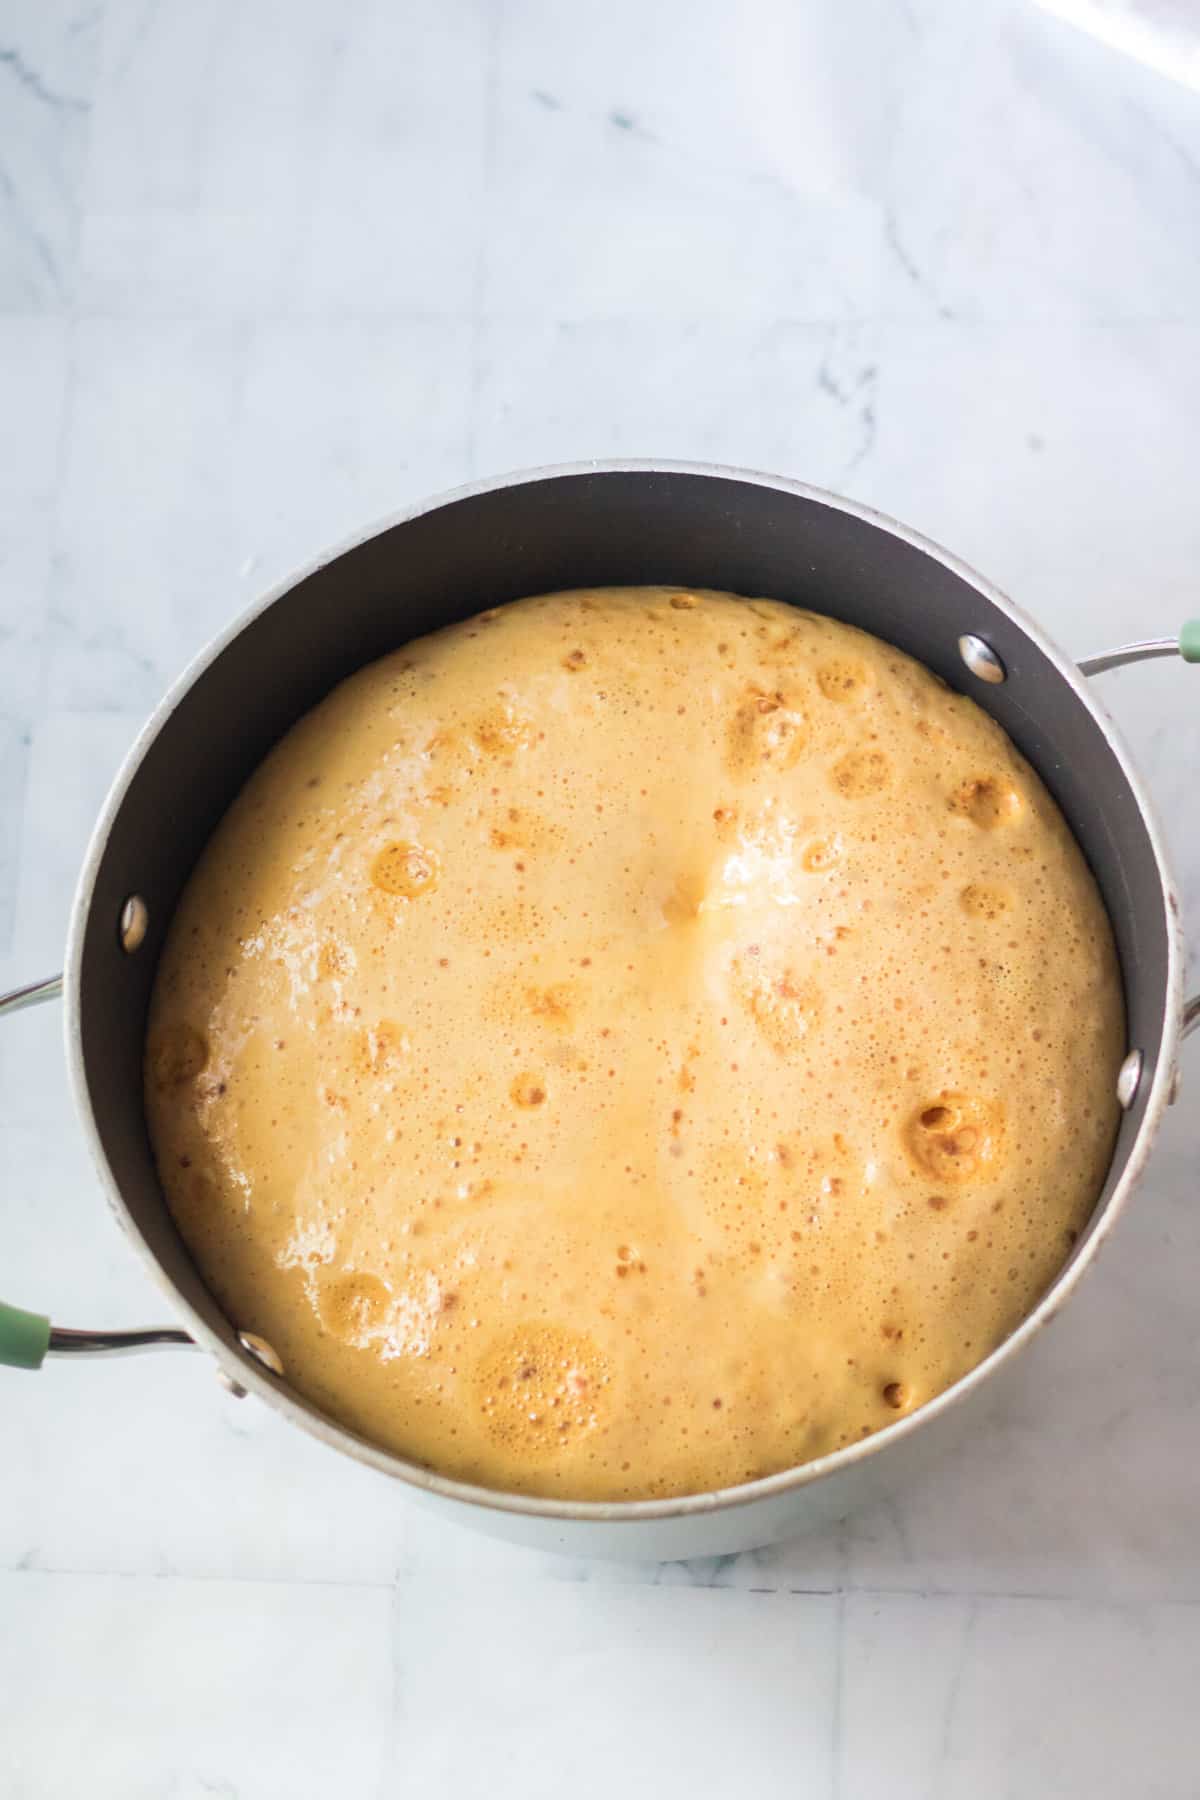
Step 4: Pour the foamy mixture into the prepared baking sheet lined with parchment paper. Do not spread. Just leave it alone while the baking soda does its thing.
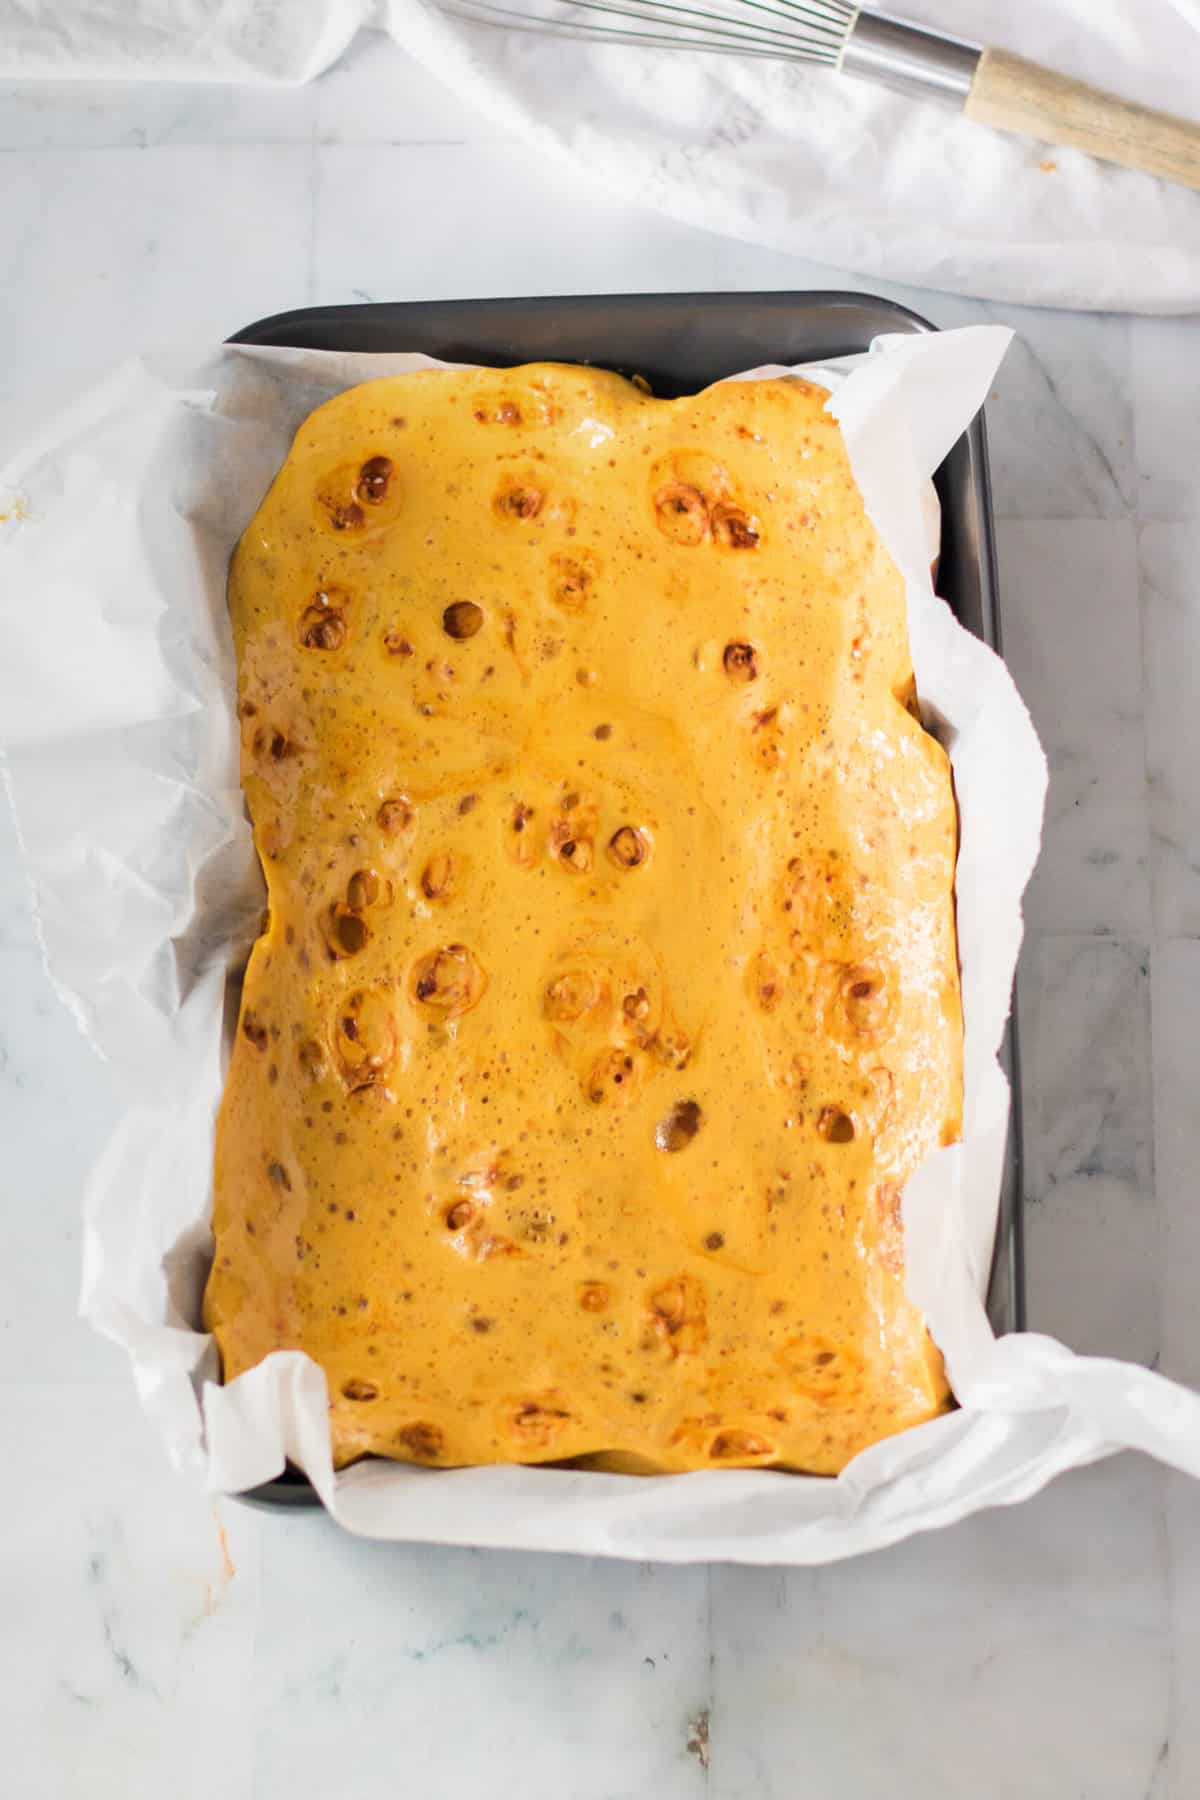
Step 5: Let the candy cool completely. This should take about an hour.
Step 6: Once the candy cools, lift it out of the pan using the parchment paper and break it into pieces with your hands, a sharp knife, or by tapping it against the countertop.
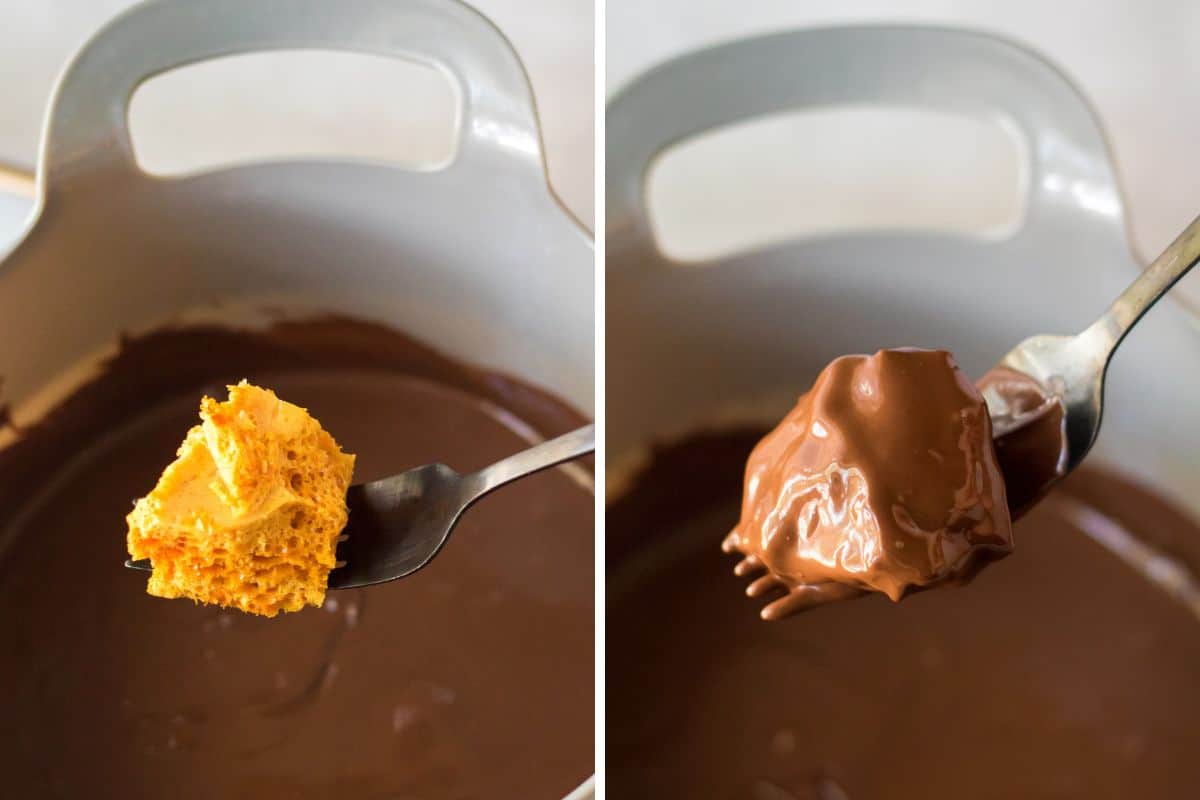
Step 7: Melt the almond bark in the microwave in 30-second intervals, stirring each time, until it’s completely melted and smooth.
Step 8: Work fast to dip each of the honeycomb pieces in the melted chocolate using two forks. Tap or shake off the excess chocolate.
Step 9: Place the dipped candy back on the lined baking dish, and add sprinkles immediately. Or allow the chocolate to set up and then drizzle with white chocolate.
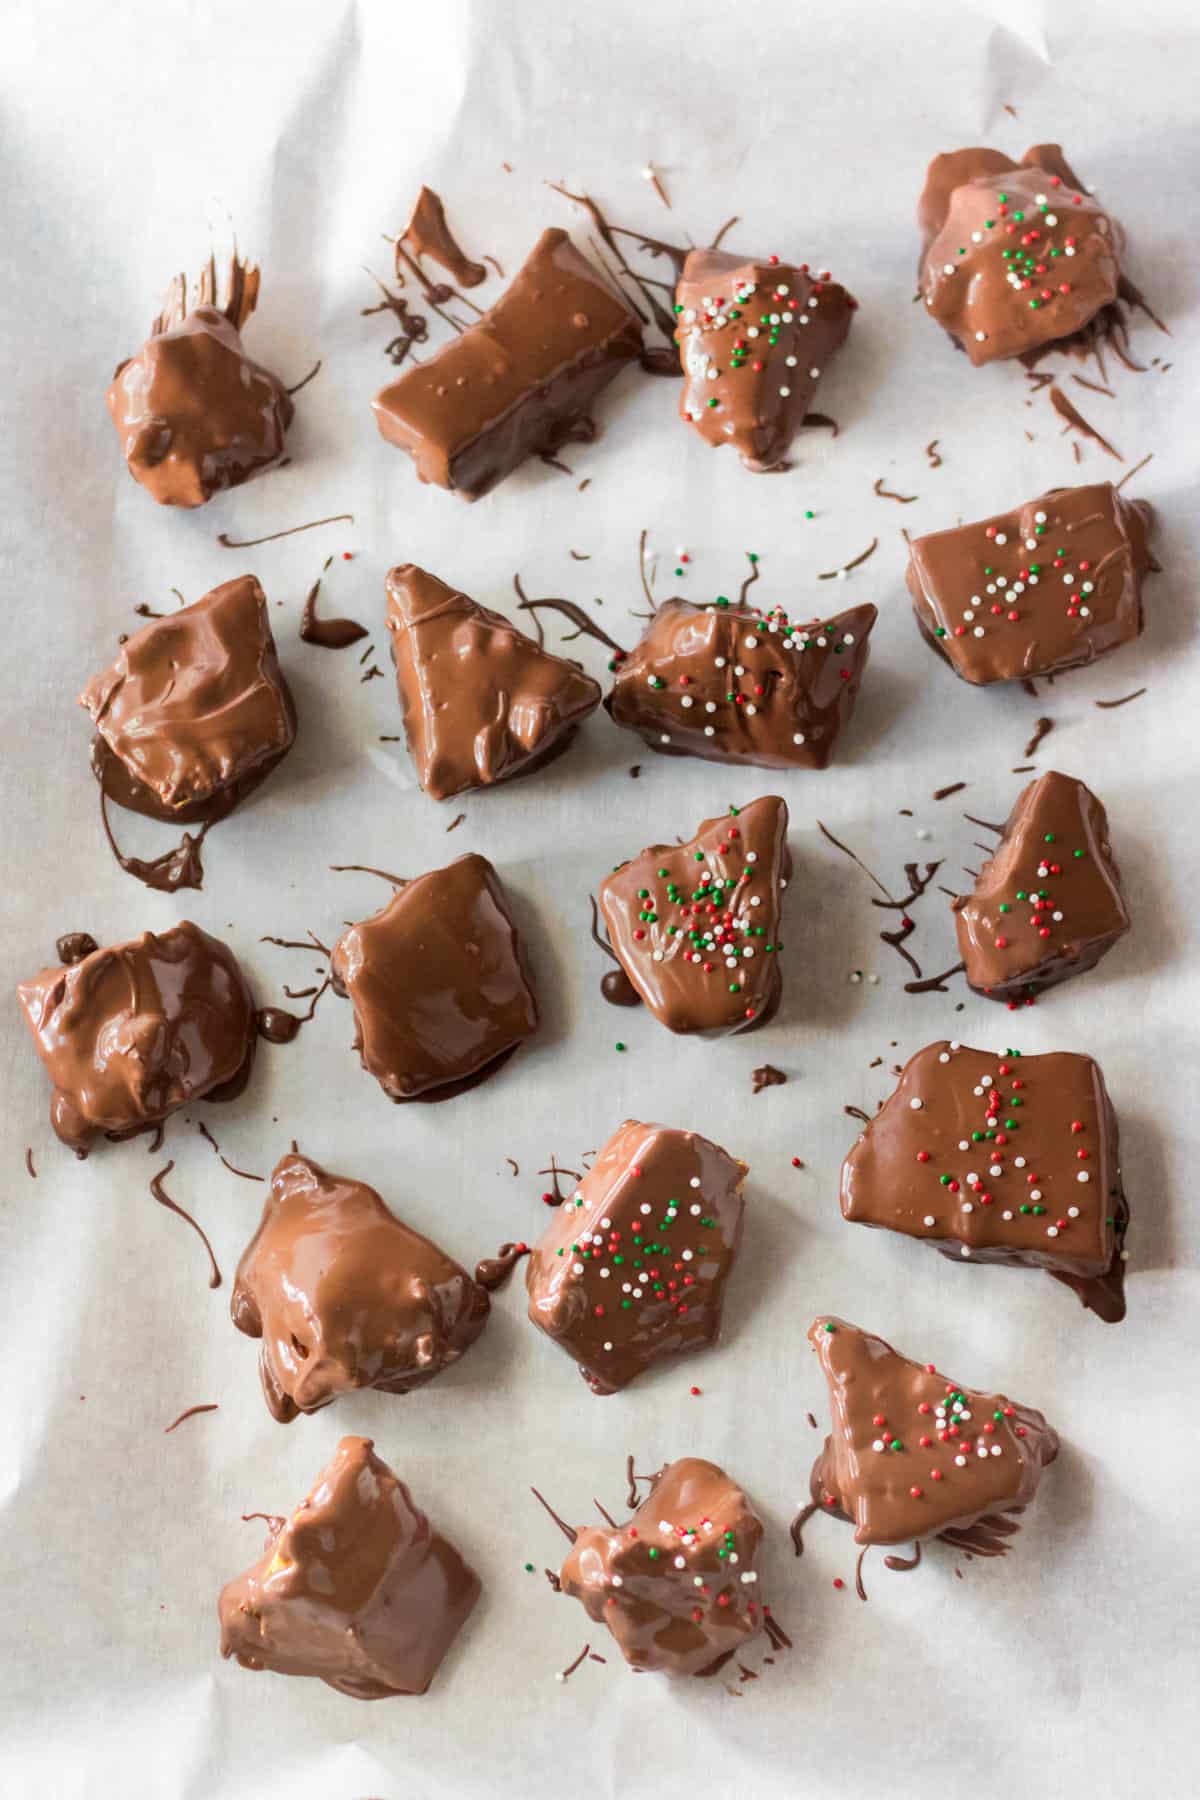
Step 10: Let the chocolate coating cool and set up completely before serving or storing in an airtight container.
Storage and Freezing
You can store this homemade honeycomb candy in an airtight container at room temperature for up to 5 days.
However, honeycomb toffee is best when it’s fresh. Although you can store it up to 5 days, the texture and flavor are best during the first 1-2 days.
Coating the honeycomb in chocolate like we do in this recipe keeps it light and crispy longer. Without it, it’s more prone to drawing moisture from the environment.
It’s really important to keep moisture out, so don’t leave the candy out in the open. Store the candy in a plastic baggie with the air squeezed out or an airtight container. And make sure to seal the baggie or container airtight.

Honeycomb Recipe Tips and Tricks
- Prep everything before you start. You have to move quickly during certain parts of this recipe, so the last thing you need is to have to look for the whisk or measure your baking soda at that crucial moment.
- Avoid cranking up the heat to get the candy to temperature faster. Medium-high is just right. You don’t want to scorch it!
- Use a whisk to mix in the baking soda and make the sugar mixture foam up quickly.
- If you plan to make a lot of this candy (for gift giving), I recommend doing it in separate batches. The mixture foams up to make a lot, and it’ll be hard to contain a double batch.
- Occasionally, honeycomb or seafoam candy sticks to parchment paper. Just to be sure yours comes off easily, you can spray it lightly with cooking oil before beginning.
- For a thicker honeycomb, place the candy mixture in a slightly smaller pan.
Additions and Variations
Skip the chocolate coating. Honeycomb is delicious without the added chocolate, so just skip it if you’d like.
Try a different type of chocolate. Milk chocolate, semisweet chocolate, dark chocolate, or white chocolate are all tasty options for this unique candy.
Sprinkle with sea salt. If you’re a fan of chocolate and salted caramel, sprinkling the candy with a coarse salt just before the chocolate sets will give you a similar flavor.
Make it vegan. Skip the honey and substitute golden syrup or dark corn syrup instead. Dip the honeycomb pieces in vegan chocolate to finish it off. All the other ingredients are vegan-friendly.
Chocolate Covered Honeycomb Candy Recipe FAQ
No, this is not made with a real honeycomb. Instead, it has the appearance of a honeycomb because of its color and the holes throughout the candy created by the baking soda reaction.
You need only a handful of simple ingredients for this homemade candy recipe: sugar, water, corn syrup, honey, baking soda, and almond bark. Sprinkles are optional but fun!
It is very similar, and for some family recipes, it may be the same. However, honeycomb candy has larger holes and more defined structure. It is also made with honey while sponge candy is made with only corn syrup. Stefanelli’s Candies has more information on the differences between these two delicious treats.
The heat from the sugar mixture causes the baking soda to release gas. The gas gets trapped in the mixture, creating holes as it hardens for that signature honeycomb look.
You probably didn’t cook the mixture long enough. A candy thermometer takes the guesswork out of candy making. It should read around 300°F or 149°C before removing from the heat and adding the baking soda.
No, just let it cool to room temperature for an hour before breaking into smaller pieces using your hands or a sharp knife. You don’t need to refrigerate it after dipping it in chocolate, either. Once the chocolate is set, store the honeycomb at room temperature in an airtight container.
More Festive Christmas Candy Recipes
- Crockpot Peanut Clusters
- Peanut Butter Fritos Candy
- Reindeer Bark
- Martha Washington Candy with Cherries
Still want more? Check out all 50+ of my homemade candy recipes!

Chocolate Covered Honeycomb Candy
Ingredients
- 1 1/2 cups granulated sugar
- 1/2 cup water
- 1/3 cup light corn syrup
- 3 Tablespoons honey
- 4 teaspoons baking soda
- 1 pound chocolate almond bark or chocolate melts
- white chocolate melts optional
- sprinkles optional
Instructions
- Line a 9×13 baking dish with parchment paper. Leave some of the paper hanging over the sides of the pan to make it easier to remove. Set the pan aside.
- Add the sugar, water, corn syrup, and honey to a pot with a heavy bottom. Stir the ingredients gently to combine. Cook over medium-high heat until a candy thermometer reads 300°F and the candy is light caramel in color. Do NOT stir while it is cooking.
- Remove the pot from the heat and immediately stir in the baking soda. Stir quickly until just combined, but do NOT over-stir.
- Immediately pour the candy mixture into the lined baking dish. Do not spread the mixture; just let the baking soda do its magic.
- Let the candy cool completely — about 1 hour.
- Once the candy is cool, lift it out of the pan using the overhanging parchment paper. Break it into small pieces using your hands, a sharp knife, or by tapping it on the countertop.
- Melt the almond bark in the microwave in 30-second intervals. Stir after each interval until the chocolate is completely smooth and melted.
- Work quickly to dip each piece of honeycomb candy into the chocolate. Tap off the excess.
- Place the dipped candy back onto the lined baking dish and immediately top with sprinkles before the chocolate hardens. Or instead of sprinkles, top with a drizzle of white chocolate for contrast.
- Let the coated candies set completely before serving or storing in an airtight container.
Notes
- Store honeycomb candy in an airtight container for up to 5 days.
- If you don't have a candy thermometer, pull the sugar mixture off the heat when it's a light caramel color. Don't let it get dark in color.
Nutrition

Did You Make This Recipe?
Share it with me on Instagram @crayonsandcravings and follow on Pinterest @crayonsandcravings for even more!



i love your Recipe and i will like to get one of your Recipe book for christmas please
This is one of my all time favorite candies. I had no idea it was so easy to make. If you buy it on line, it costs a fortune!!