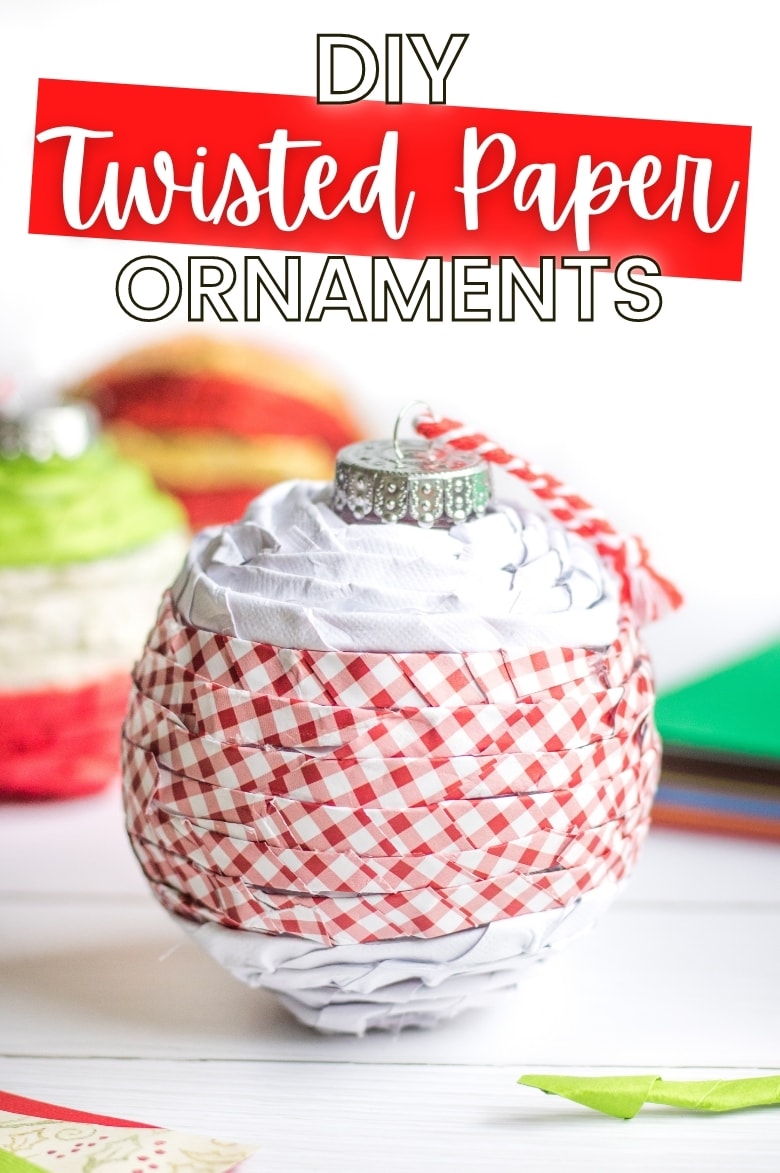
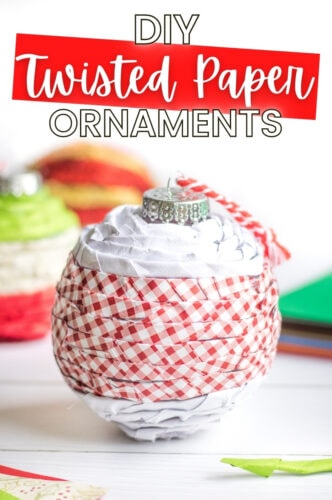
Twisted Paper Ornaments
Posts may contain affiliate links, meaning that I may earn a commission if you use a link provided.
This post is sponsored by BabbleBoxx on behalf of JOANN.
Inside: How to Make twisted paper ornaments using clear plastic ornaments and scrapbook paper.
Tis’ the season for crafting!
My favorite holiday project is making DIY ornaments for our Christmas tree. It is a tradition I enjoy every year.
There is just something about homemade ornaments that make them a thousand times more special than store-bought ornaments.
Homemade Christmas ornaments also make wonderful holiday gifts for friends, family, co-workers, and neighbors.

Twisted Paper Ornaments
This year I was inspired to create these beautiful twisted paper ornaments by a tutorial I found on JOANN.com.
I love how they came out so much I knew I had to share the Christmas craft with you all!
Making these paper twist Christmas ornaments is simple and perfect for a beginner… but twisting all that paper is time-consuming. I found it to be a relaxing craft to work on while watching Christmas movies–another one of my favorite Christmas traditions!
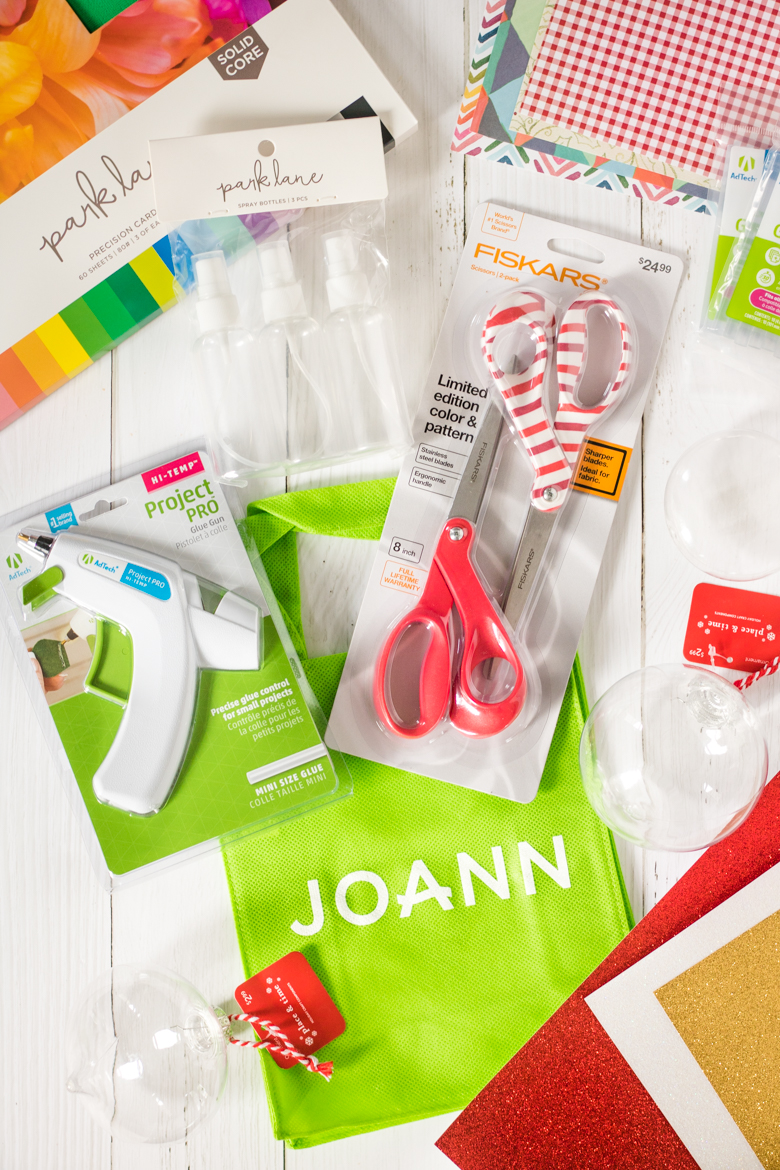
Here is what you will need:
- assorted cardstock/scrapbook paper
- assorted plastic ornaments
- scissors
- hot glue gun/glue gun sticks
- spray bottle with water
Where to shop for holiday craft supplies
When I need to stock up on craft supplies, I head to JOANN–my one-stop-shop for craft supplies.
As the nation’s leading fabric and craft retailer, JOANN has over 865 stores across 49 states.
Crafters can even shop their wide variety of craft supplies right from home on JOANN.com.
The website is a terrific source for crafting ideas and inspiration as well. It is where I found this craft idea after all!
Let’s get crafty!
Begin by cutting your paper/cardstock into 1″ strips.

Working with one strip at a time, use your spray bottle to give it light spray and slightly dampen it.
While the paper is soft and slightly damp, fold and twist each strip. Be careful not to twist the paper too tight or it may tear.
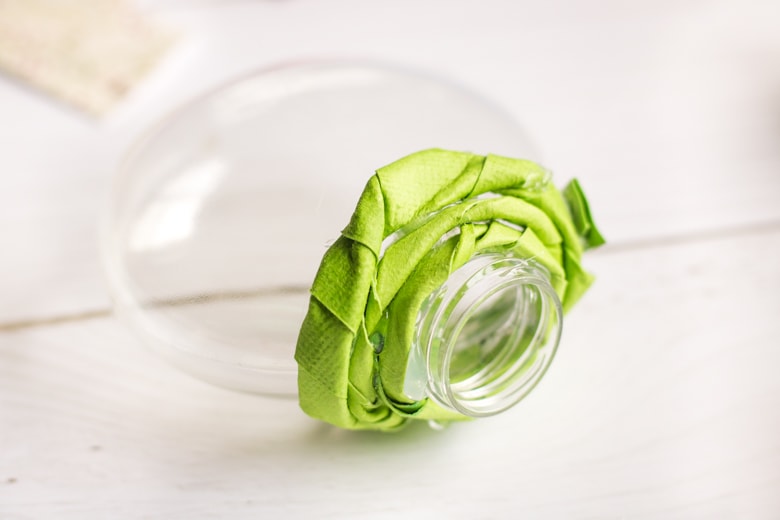
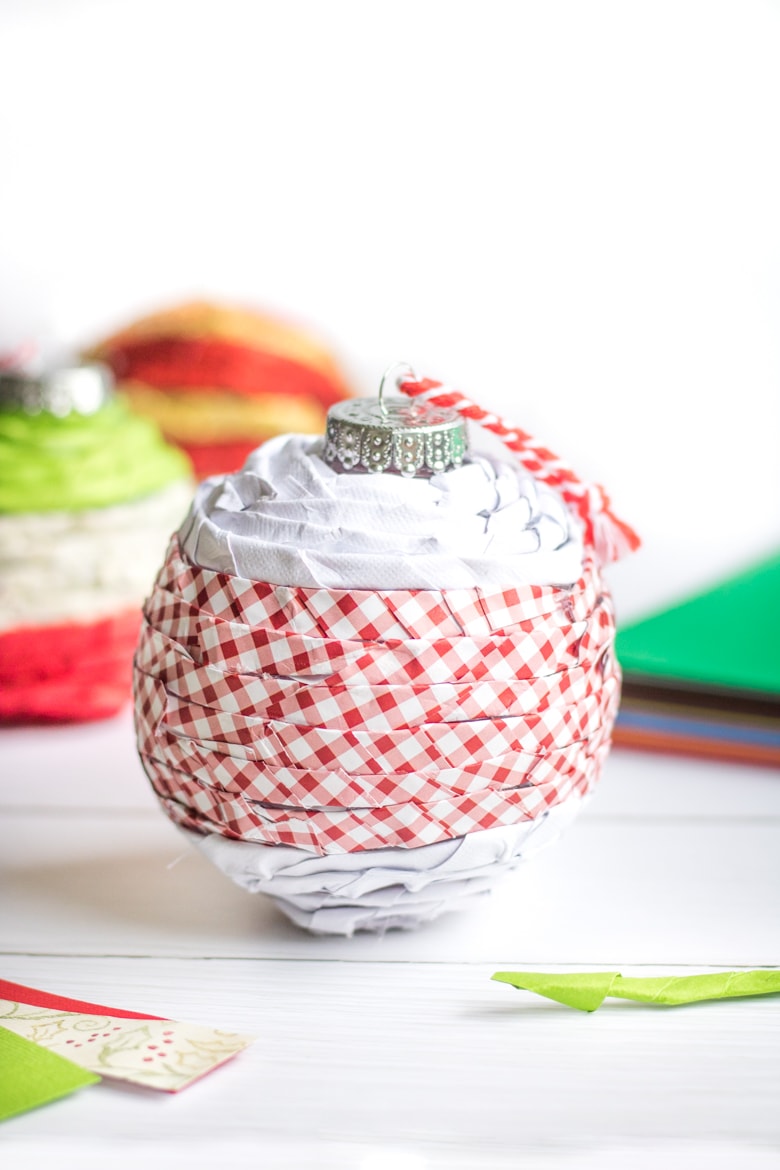
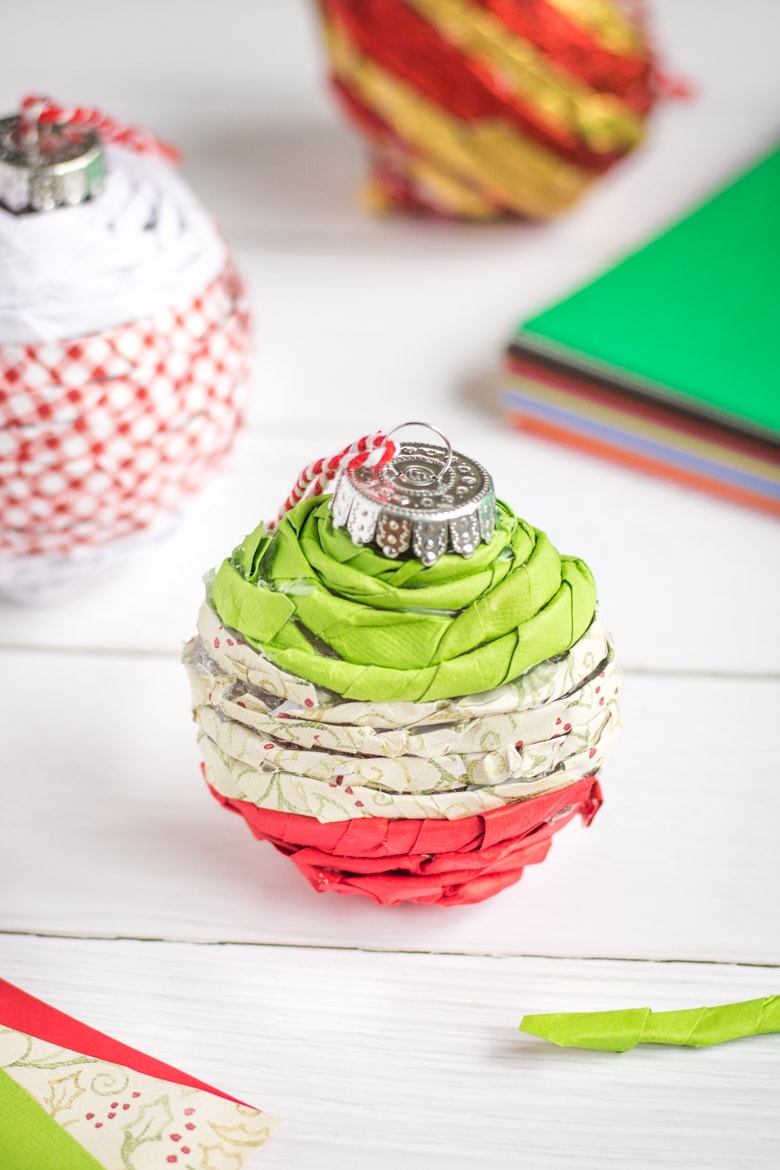
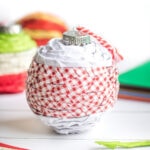
Once your strips are twisted, begin by hot-gluing a twist to the top of your ornament. Work your way around the ornament gluing the twists on as tight as you can. Try to glue them on close and tight to one another, so you don’t see the plastic ornament in-between them.
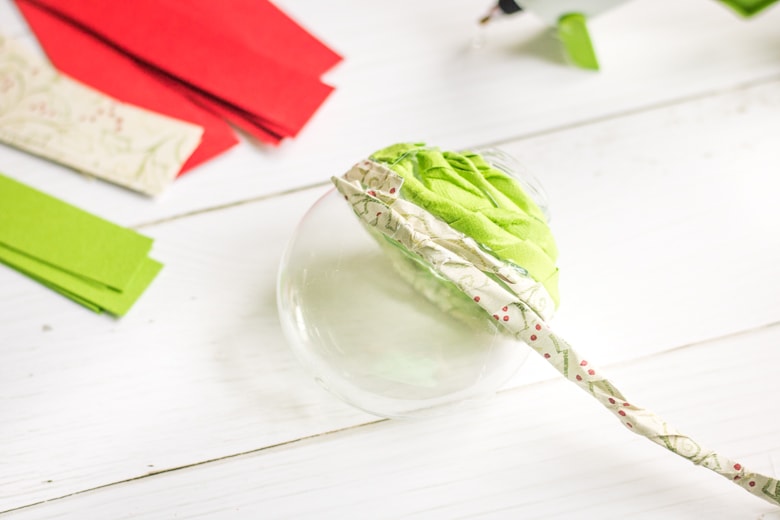
Mix and match colors and patterns of paper/cardstock to create your own unique design.
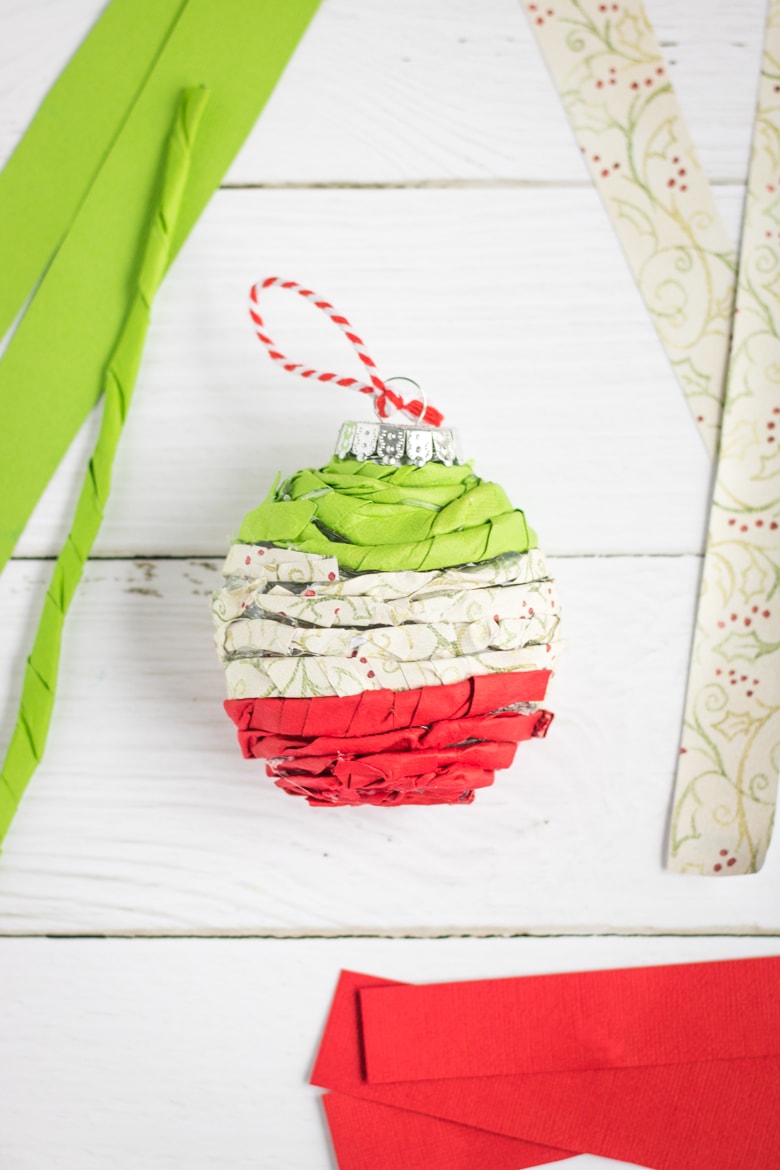
When your ornament has been completely covered with twisted paper, add a bit of ribbon or string to hang, if necessary. We were able to skip this last step as the ornaments we got from JOANN came with a loop of string already attached.
Customize to fit your decor
What I really love about this ornament craft is how you can customize your ornaments to fit your style and decor.

JOANN has a huge variety of cardstock and scrapbook paper which gives you endless color and pattern combination options.
Happy holidays and happy crafting!

Twisted Paper Ornaments
Equipment
- Scissors
- hot glue gun/glue gun sticks
- spray bottle with water
Supplies
- assorted cardstock/scrapbook paper
- assorted plastic ornaments
Instructions
- Cut your paper/cardstock into 1" strips.
- Using your spray bottle, slightly dampen your strips of paper, one at a time.
- While the paper is soft and slightly damp, begin to fold and twist each strip. (Be careful not to twist too tight, you don't want to rip or tear the strips.)
- Once your strips are twisted, begin by hot-gluing a twist to the top of the ornament. Work your way around gluing the twists on the ornament as tight as you can. You want to keep them close and tight, so you don't see the ornament between them.
- Mix and match colors and patterns to create your own unique design.
- Once the ornament has been covered, add some ribbon or string to hang.
Notes
Did You Make This Craft?
Share it with me on Instagram @crayonsandcravings and follow on Pinterest @crayonsandcravings for even more!