

2 Ingredient Biscuits
Posts may contain affiliate links, meaning that I may earn a commission if you use a link provided.


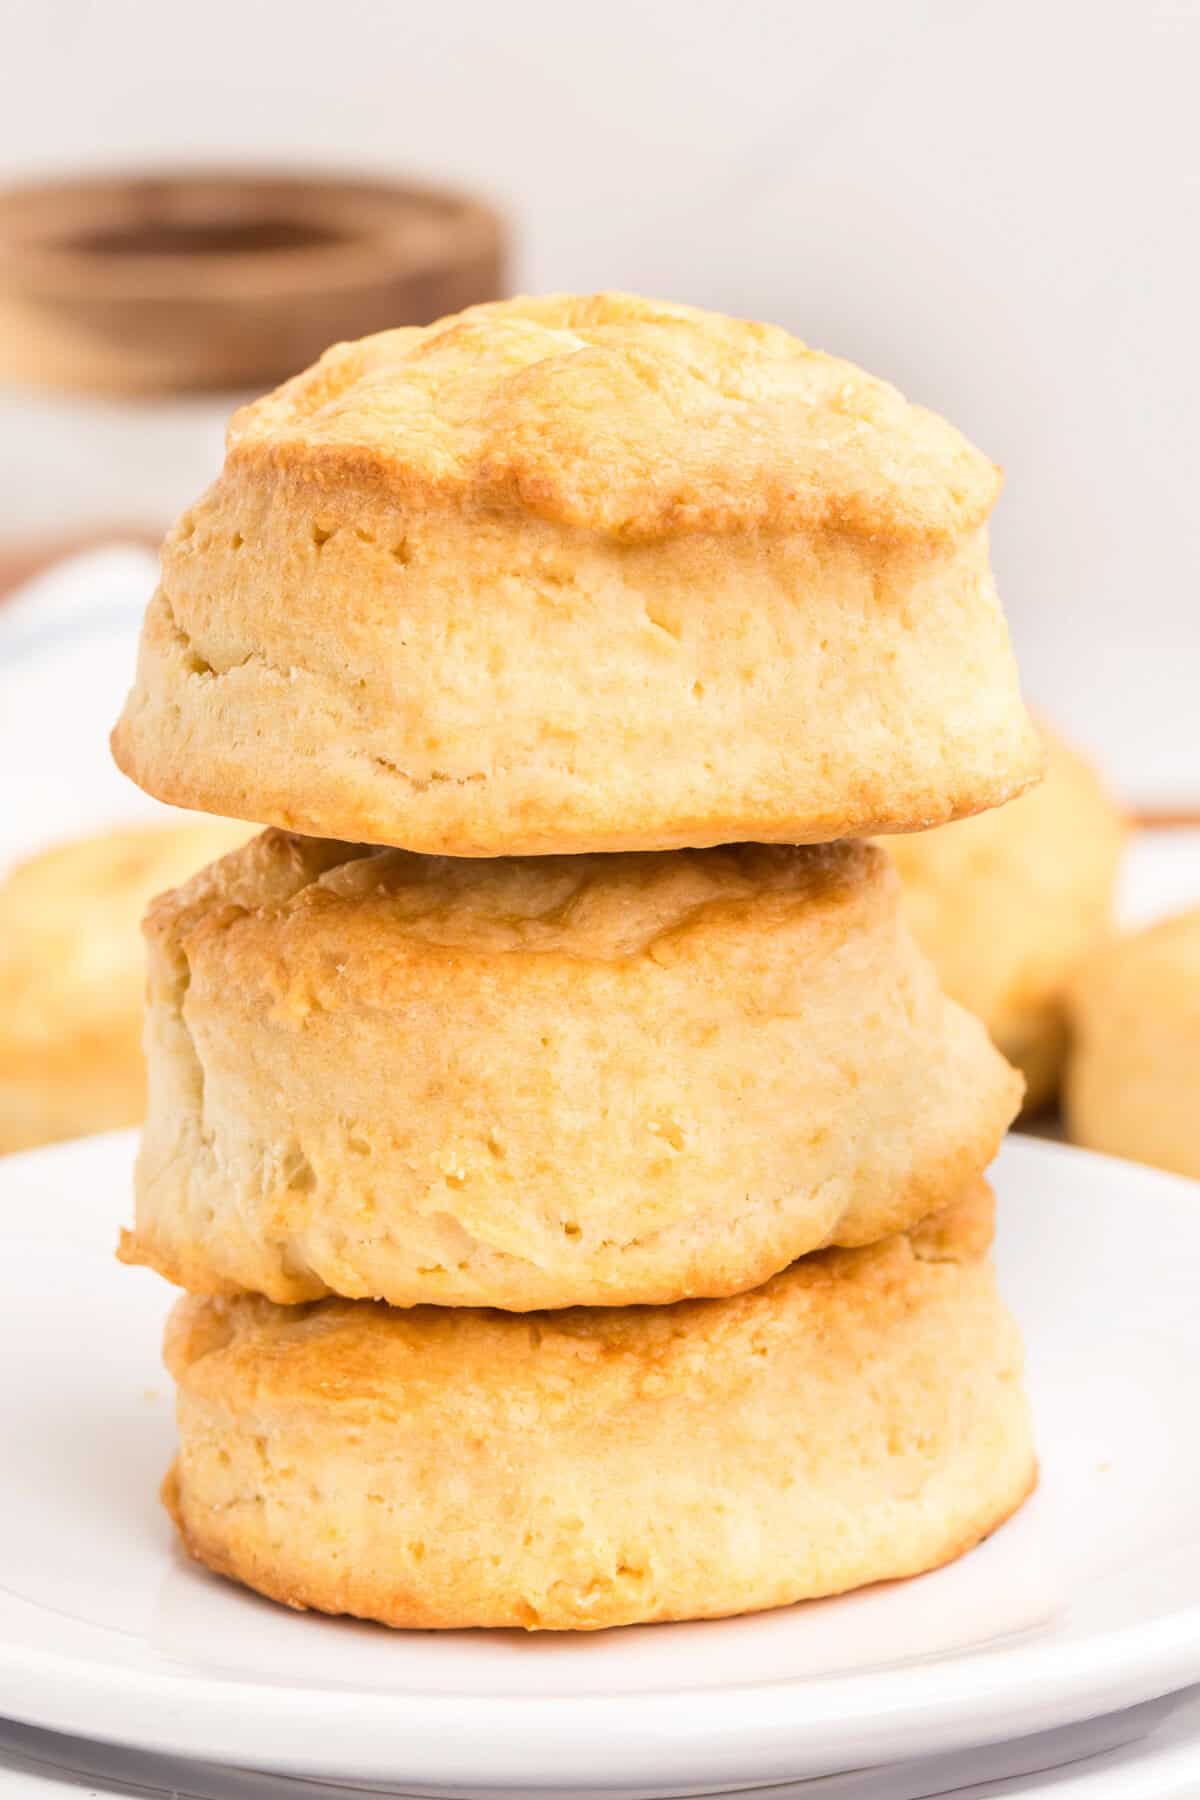
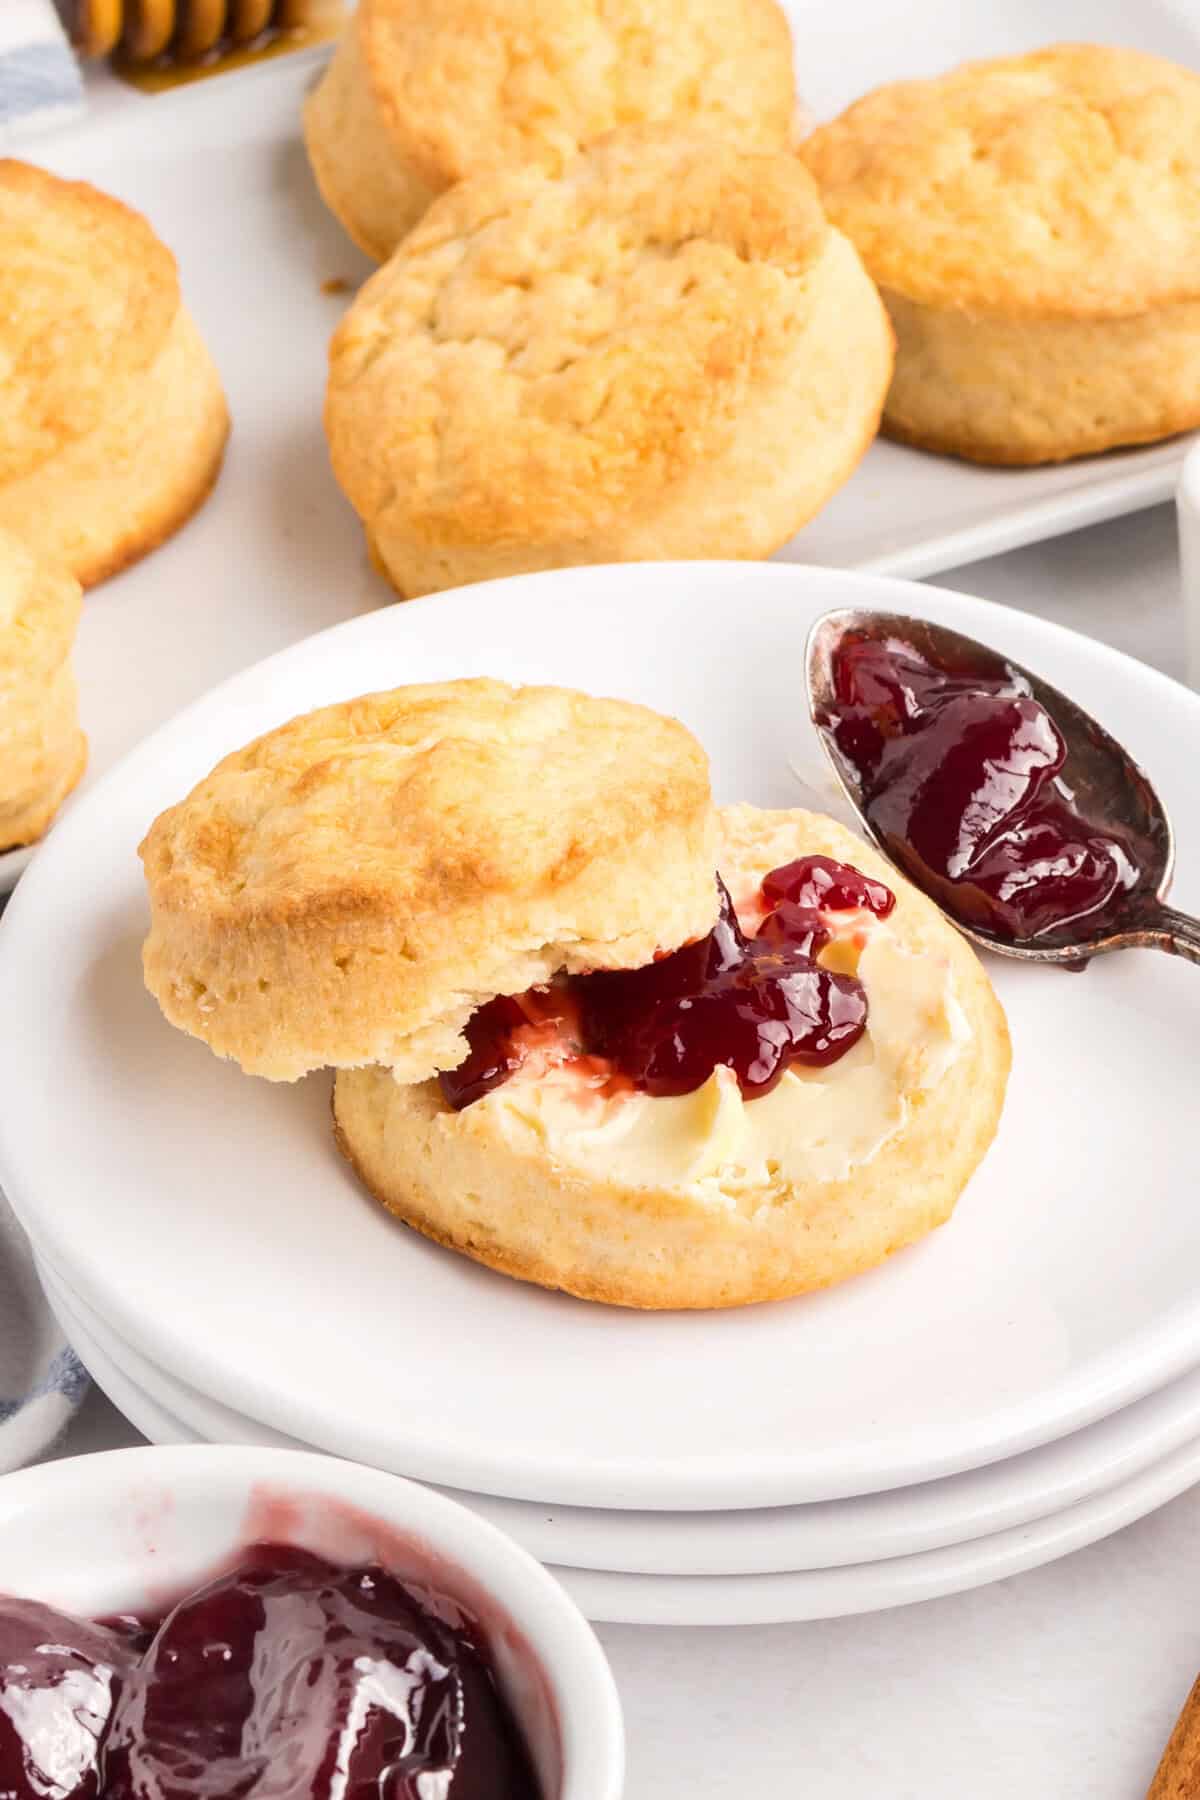
Flaky, golden, and shockingly easy, these 2 ingredient biscuits are as simple as baking gets.
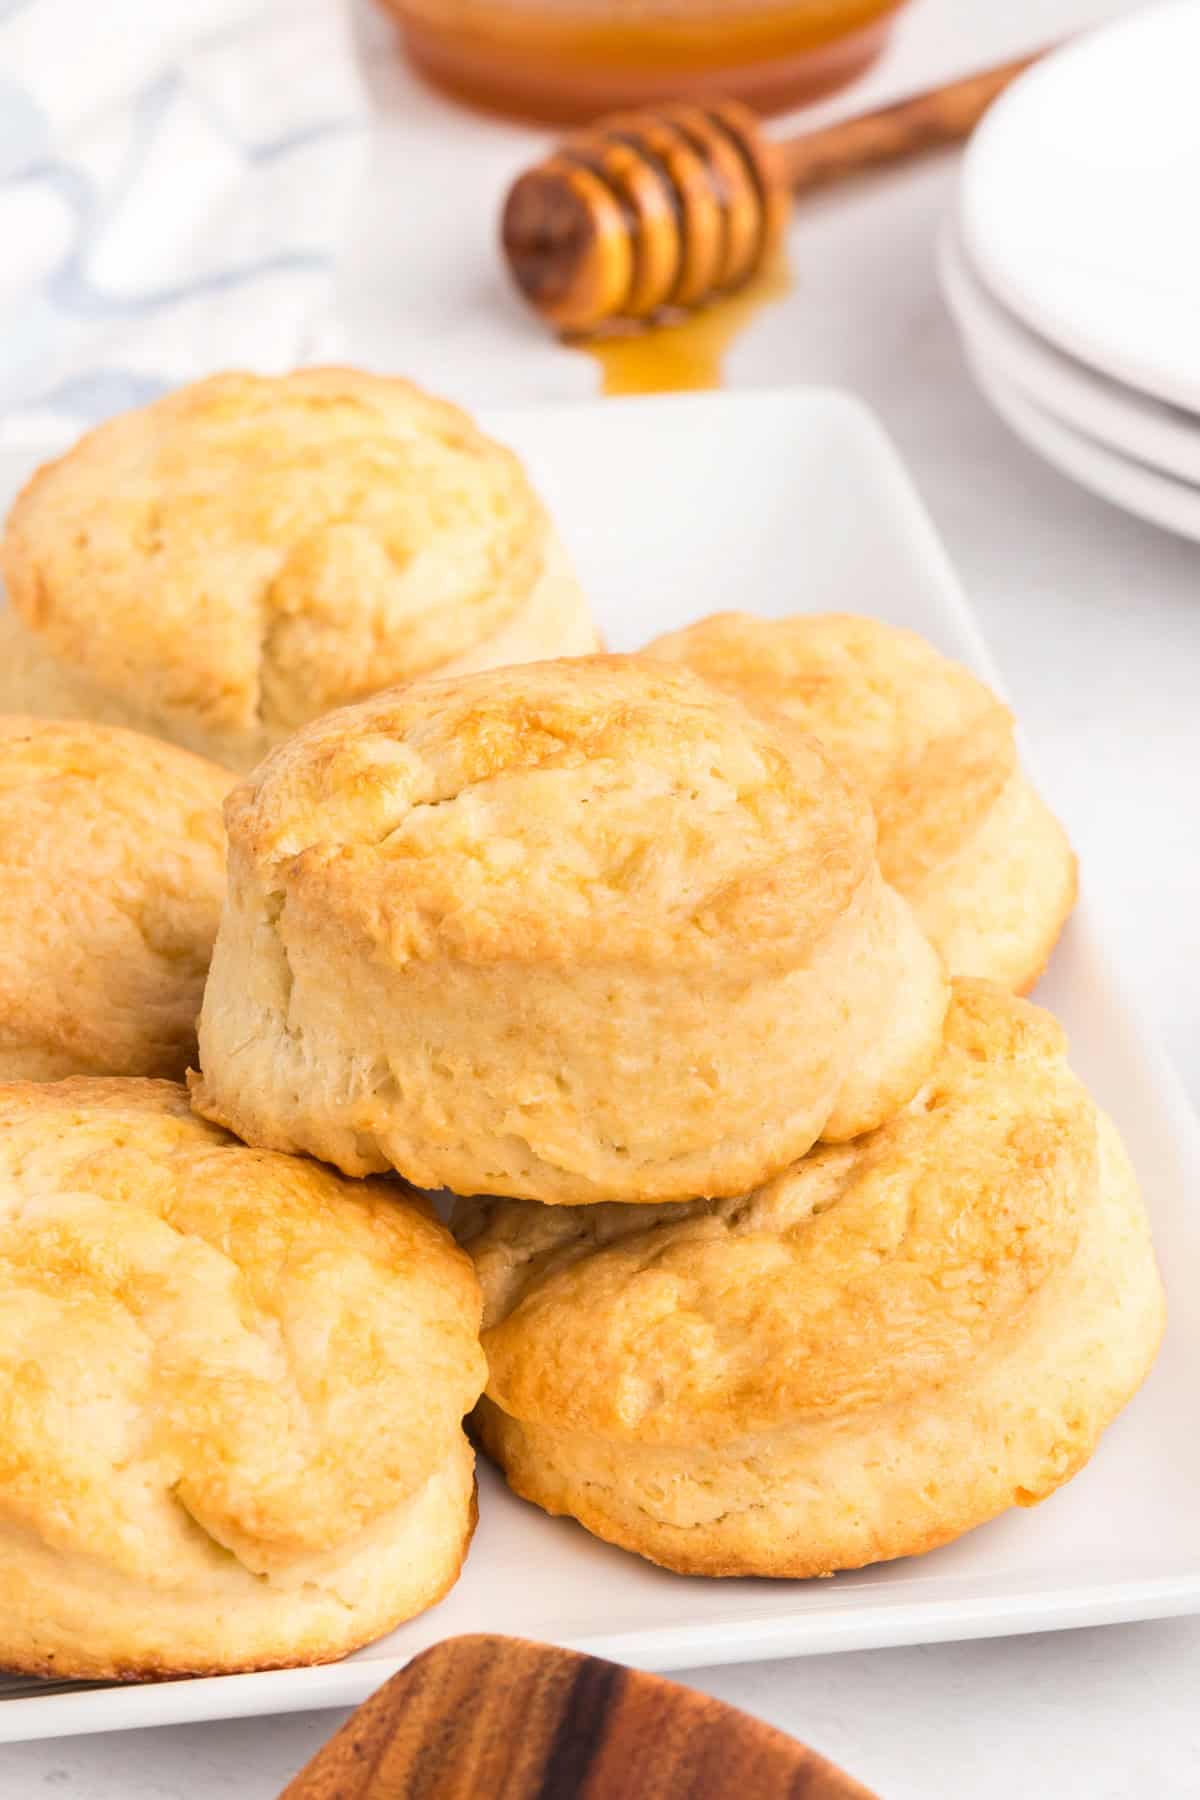
There’s something so comforting about a warm biscuit, fresh out of the oven. And when it only takes two ingredients? You might find yourself making these on repeat.
I first tried this recipe on one of those busy nights when I needed something quick to serve alongside the soup we were having for dinner. Self-rising flour and heavy cream, just those two simple ingredients, and 20 minutes later, I had soft, fluffy biscuits on the table. They remind me of my 7 Up Biscuits—surprisingly simple and just as crave-worthy.
If you love a quick homemade biscuit, don’t miss my Cheddar Drop Biscuits or classic Buttermilk Biscuits. But for a no-fuss option that’s beginner-friendly, these are the ones to keep in your back pocket.
Whether it’s breakfast with jam, a side for soup, or part of your Christmas or Thanksgiving dinner spread, these two-ingredient biscuits are a go-to. No fuss, just good food.
Why you’ll love this recipe
- Only 2 ingredients—no butter, eggs, or oil needed
- Ready in under 25 minutes
- Foolproof for beginners and pros alike
- Perfectly flaky and tender without cutting in cold fat
- Great with savory or sweet toppings
Ingredient Notes
This section includes ingredient notes and substitution options. Get all measurements, ingredients, and instructions in the printable recipe card at the end of this post.
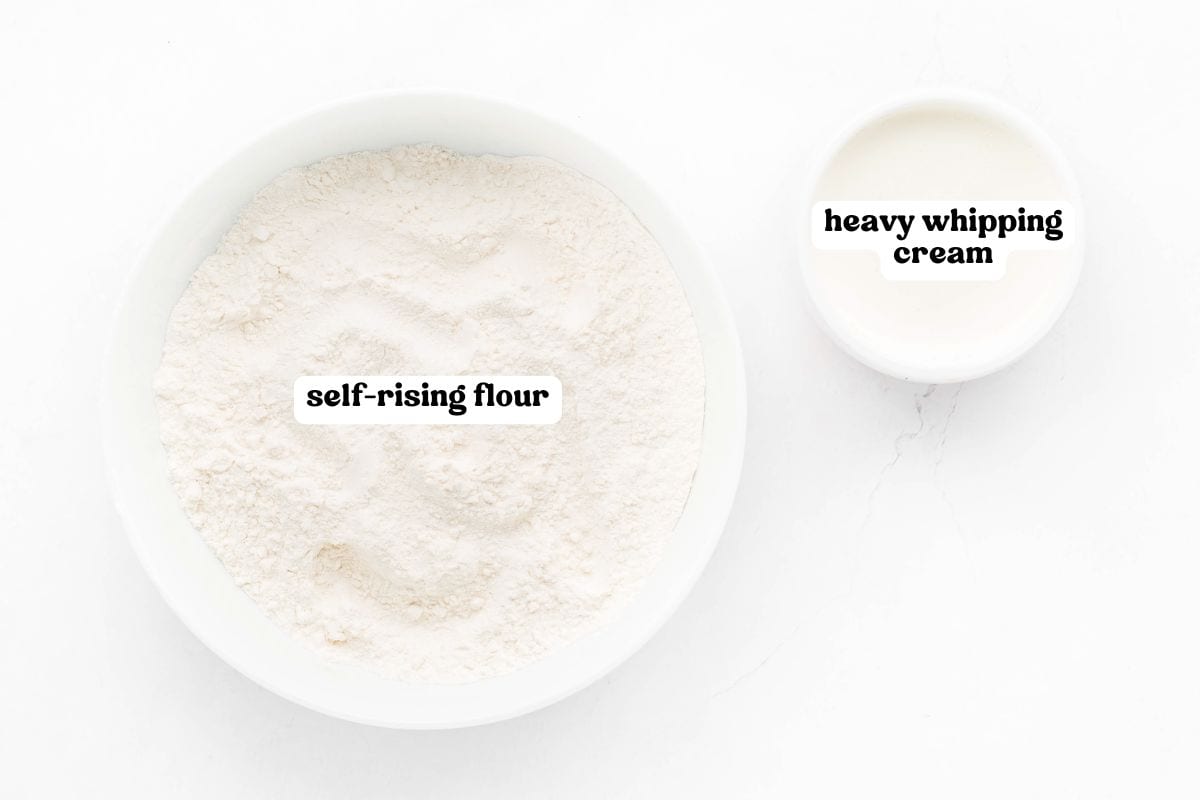
- Self-Rising Flour – This flour already includes baking powder and salt, so don’t substitute with all-purpose unless you add leavening (see section below).
- Heavy Whipping Cream – Look for cream with at least 35% fat. It acts as both the fat and liquid, adding lots or moisture to create rich, tender biscuits.
How to Make Your Own Self-Rising Flour
If you don’t have self-rising flour, you can easily make your own using all-purpose flour and a couple pantry staples.
For every 1 cup of self-rising flour, mix:
- 1 cup all-purpose flour
- 1½ teaspoons baking powder
- ¼ teaspoon salt
Whisk the ingredients together, then use in place of the self-rising flour in the recipe.
Equipment Needed
- Rolling Pin – Any rolling pin works, but one with thickness guides makes it easier.
- Cutter – Or use a 3 inch biscuit cutter, cookie cutter, or glass to cut out biscuits.
- Pastry Brush – For brushing the tops with cream before baking.
- Baking Sheet / Sheet Pan – Use a rimmed pan for even baking and easier handling.
- Parchment Paper – To line your baking sheet and prevent sticking.
How to Make 2-Ingredient Biscuits
This section shows you how to make the recipe with step-by-step photos and instructions. For the full printable recipe, see the recipe card below.
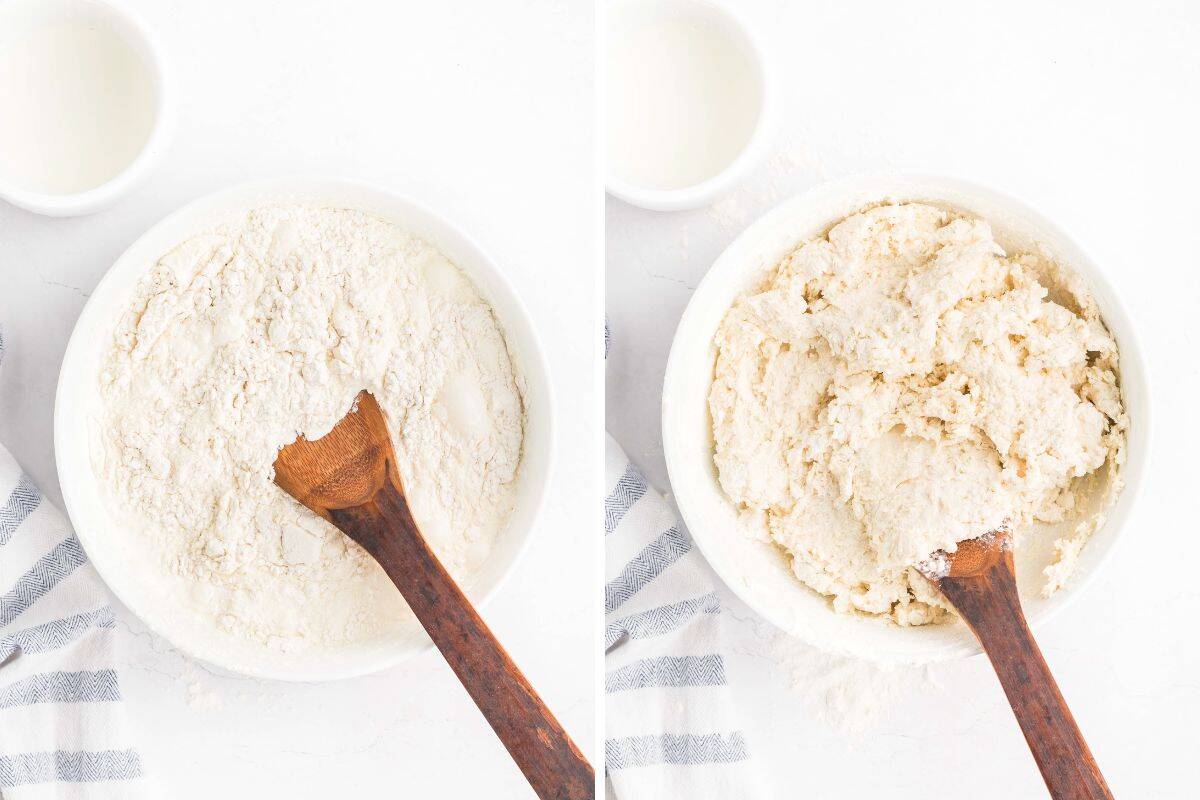
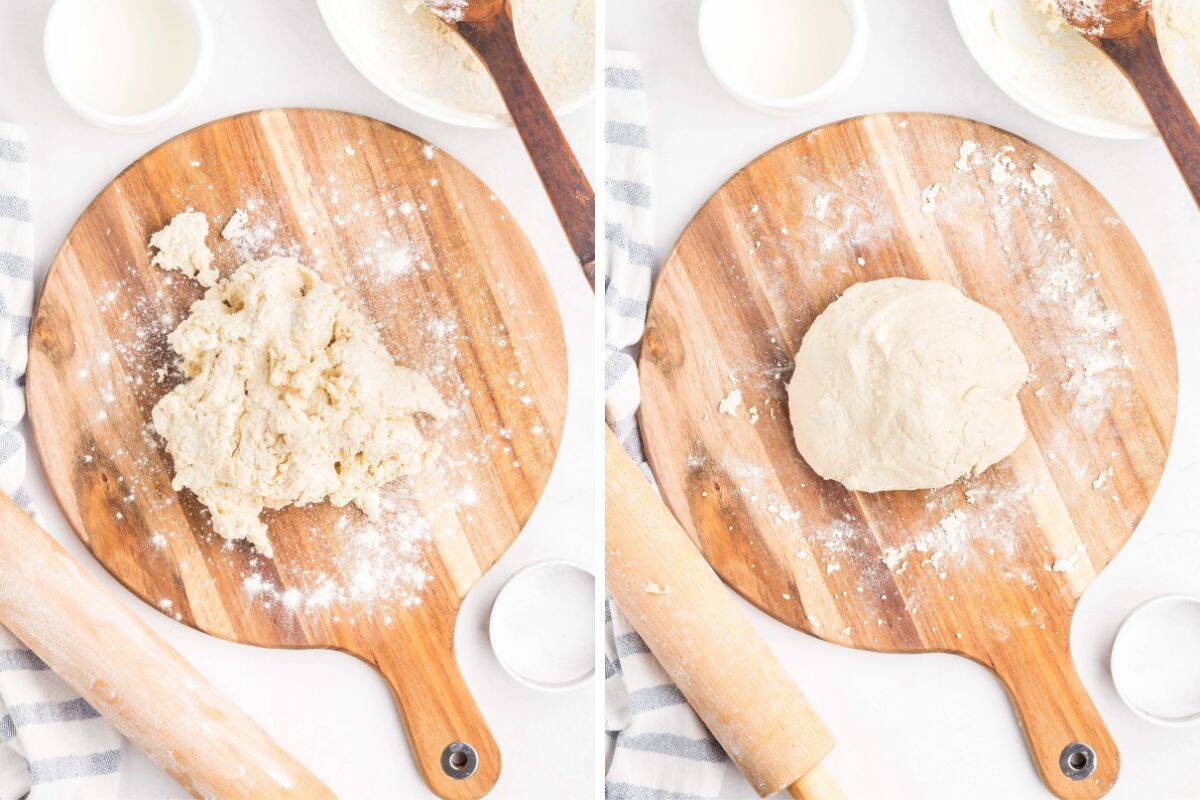
Stir to combine flour with 1½ cups heavy cream until just combined.
Knead briefly on a floured surface to form a soft dough.
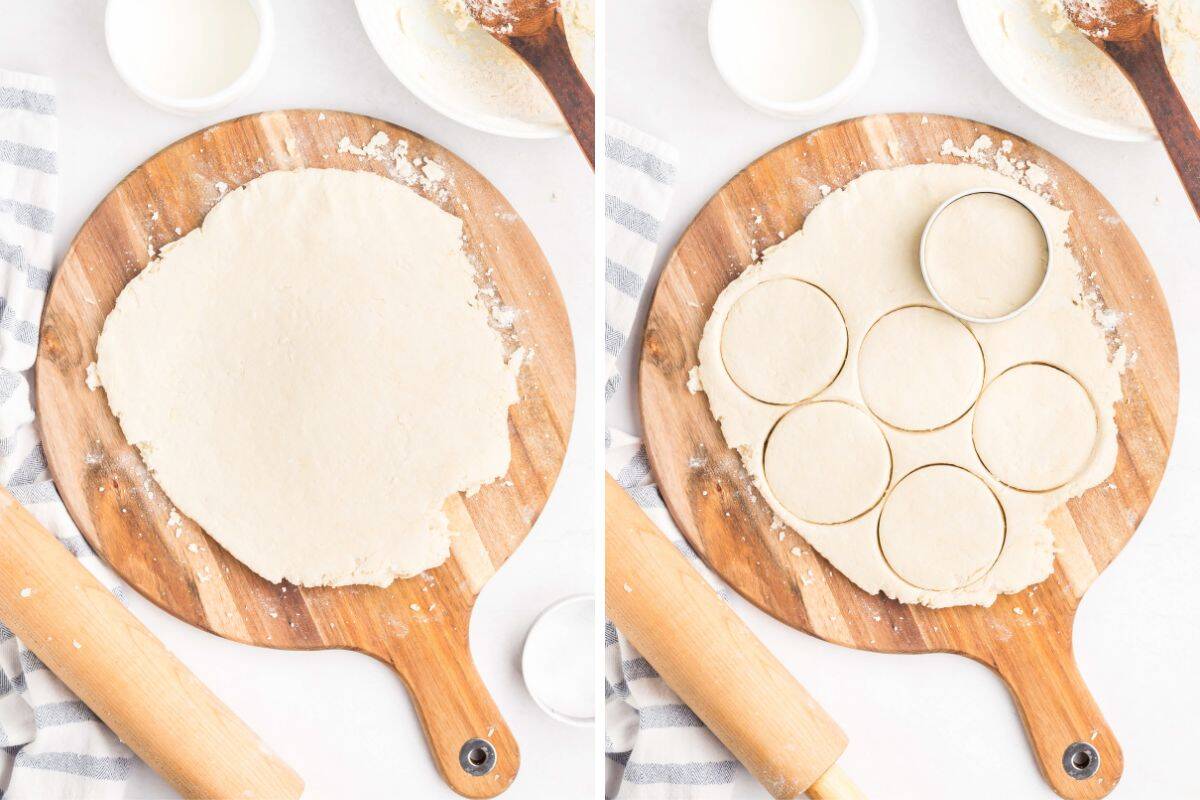
Roll to ½-inch thick and cut biscuits using a biscuit or cookie cutter (press, don’t twist!).
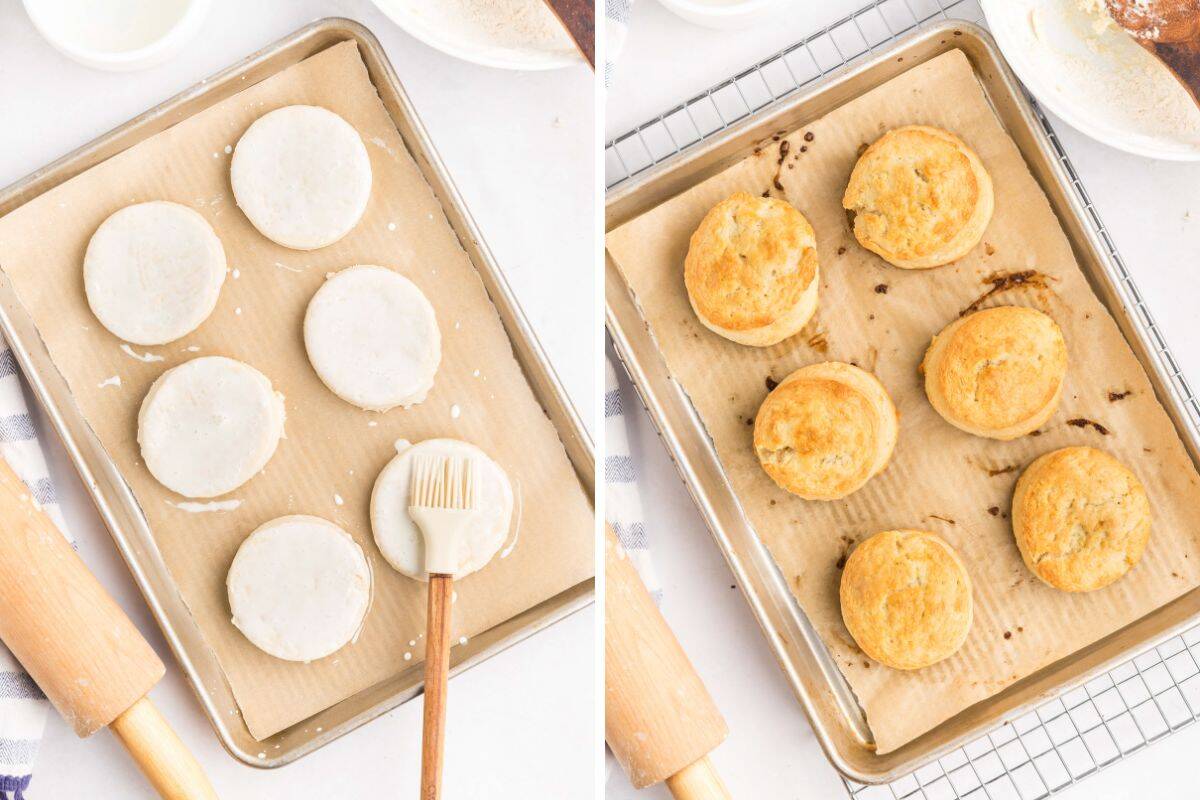
Place on prepared baking sheet and brush tops with remaining cream. Bake for 12 minutes, then broil until golden brown. Watch closely!
Storage
Room Temperature: Store in an airtight container for up to 2 days.
Fridge: Keep refrigerated for up to 5 days.
Freezer: Freeze baked or unbaked biscuits for up to 2 months. Add 2–3 minutes to bake time if baking from frozen.
To Reheat: Reheat in a 350°F oven for 5–7 minutes. Avoid the microwave—it softens the texture and reduces flakiness.
Tips for the Best Biscuits
- Spoon and level your flour to avoid dense biscuits.
- Knead just enough to form a dough. Overworking toughens the texture.
- Use a floured glass if you don’t have a biscuit or cookie cutter.
- Always press your cutter, don’t twist!
- Keep a close eye under the broiler—those tops brown fast.
Additions and variations
- Cheddar & Chive: Mix ½ cup shredded cheddar cheese and 1 tbsp chopped chives into the dough.
- Add a Touch of Sweetness: Add 1 Tbsp sugar to the dough. Serve with jam or whipped butter.
- Garlic Butter Glaze: Brush the baked biscuits with melted garlic butter.
- Mini Biscuits: Use a smaller cutter for bite-size versions, perfect for parties or snacks.
Serving Suggestions
These cream biscuits are incredibly versatile! Here are a few delicious ways to enjoy them:
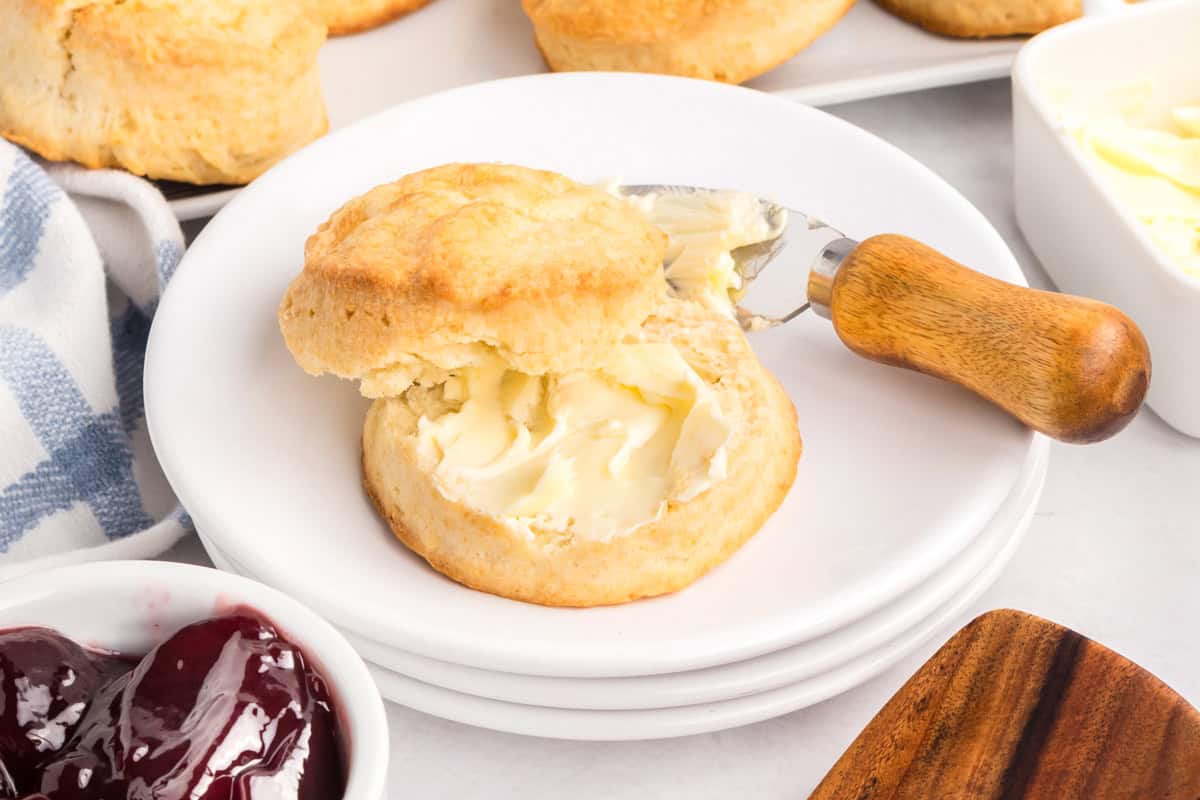
- Slather with Peach Jam or Blueberry Jam for a sweet breakfast or snack.
- Serve warm with Homemade Butter—so easy and unbelievably creamy.
- Pair with hearty mains like Cheesy Shrimp and Grits, Slow Cooker Salisbury Steaks, or Steak Bites.
- Use them to sop up a bowl of Hamburger Noodle Soup or Crack Chicken Noodle Soup.

2 Ingredient Biscuits
Equipment
- 3-inch biscuit cutter or cookie cutter, or glass
Ingredients
- 2 cups self-rising flour
- 1 ½ + ⅛ cups heavy whipping cream, divided
Instructions
- Preheat the oven to 475° F. Line a baking sheet with parchment paper and set aside.
- To a large bowl, add flour and 1 ½ cups heavy cream. Stir to combine. It will be a bit crumbly.
- Turn the dough out onto a floured surface. Knead briefly until it is combined and forms a ball. Don’t overwork the dough.
- Dust your rolling pin with flour and roll the biscuit dough out to about ½ inch thick.
- Cut the biscuits into circles with a floured biscuit cutter, cookie cutter, or glass – press straight down without twisting.
- Place on prepared pan. Brush tops with remaining ⅛ cup heavy cream using a pastry brush.
- Bake 12-14 minutes, then broil 1 minute or until golden.
Notes
Nutrition

Did You Make This Recipe?
Share it with me on Instagram @crayonsandcravings and follow on Pinterest @crayonsandcravings for even more!


Will any gluten free flour work?
I haven’t tested the recipe with GF flour but you would need either a self-rising GF flour.
These 2 ingredient Biscuits were so so good & easy to make too . Thanks for sharing..
can this biscuits be made as drop biscuits?
I haven’t tried making these as drop biscuits myself but I don’t see why it would be an issue. Please let us know how they come out if you give the recipe a try 🙂 Enjoy!